Sorting and Filtering
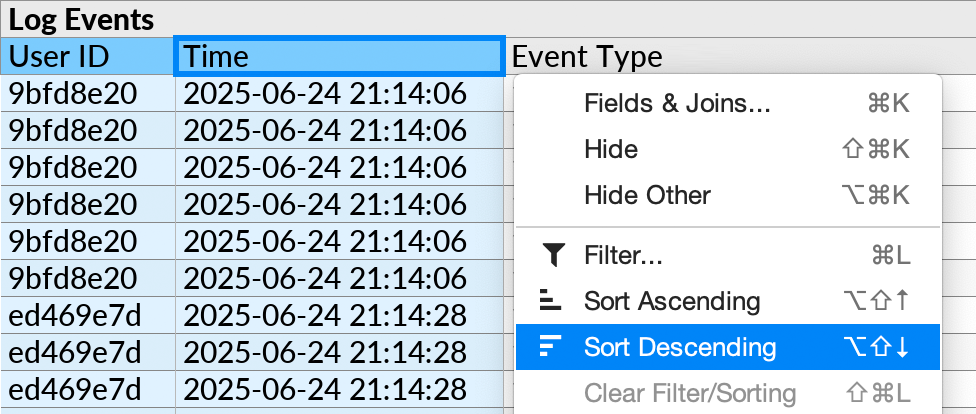
To sort or filter on data in your perspective, open the context menu (![]() ) for any field, or right-click any data value, and click the relevant action.
) for any field, or right-click any data value, and click the relevant action.
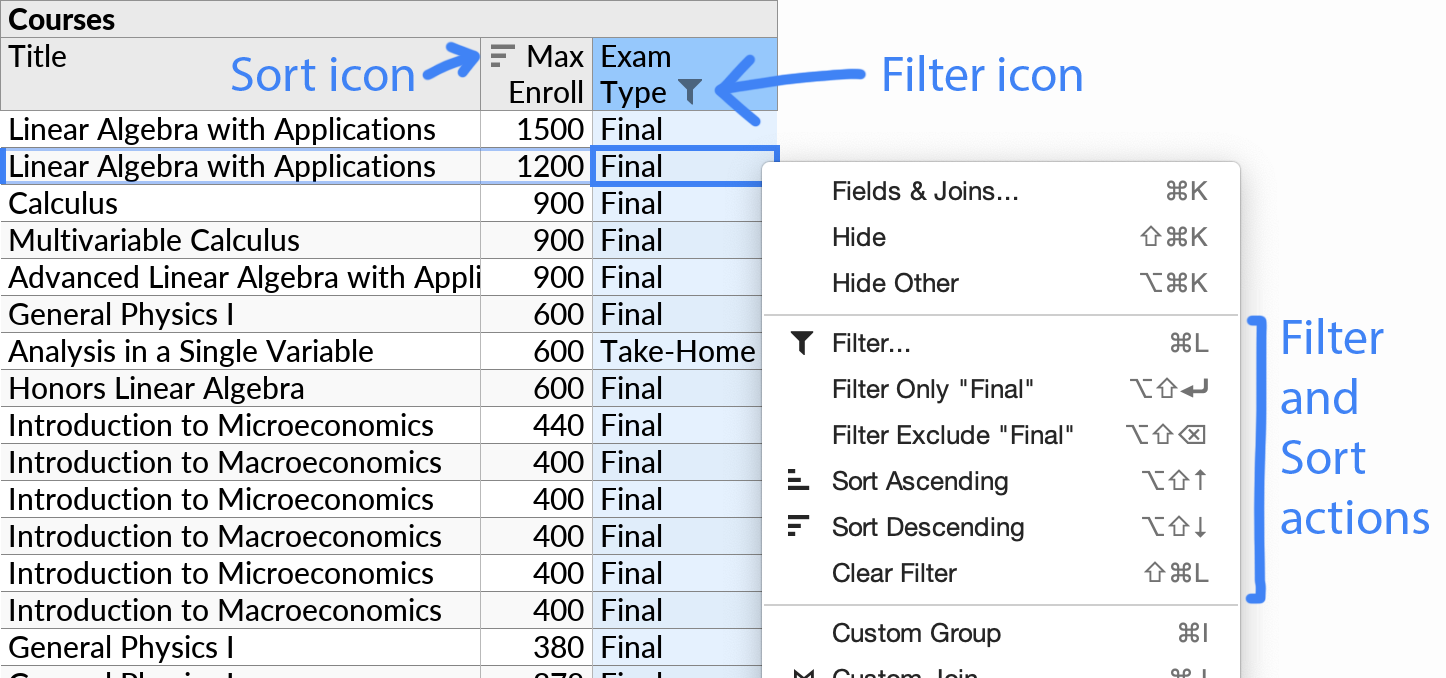
Fields that are sorted or filtered on have a corresponding icon (![]() /
/![]() ) in their table column headers and in the field selector, as seen above.
) in their table column headers and in the field selector, as seen above.
Sort and filter options remain active on their applicable fields until explicitly cleared. Use the Clear Filter/Sorting action to clear the relevant state as needed.
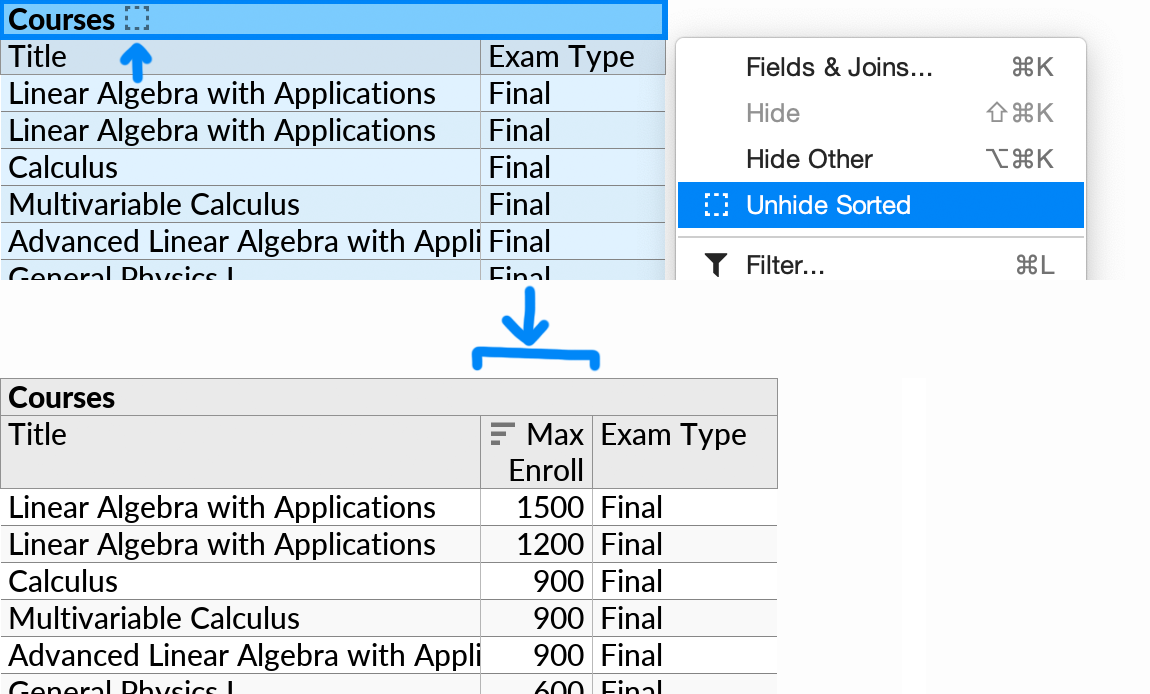
If you hide a field that is sorted or filtered on, a hidden state icon (![]() ) will be shown in the table header. An Unhide Sorted/Filtered action becomes available as a shortcut for unhiding the relevant field(s).
) will be shown in the table header. An Unhide Sorted/Filtered action becomes available as a shortcut for unhiding the relevant field(s).
Sorting
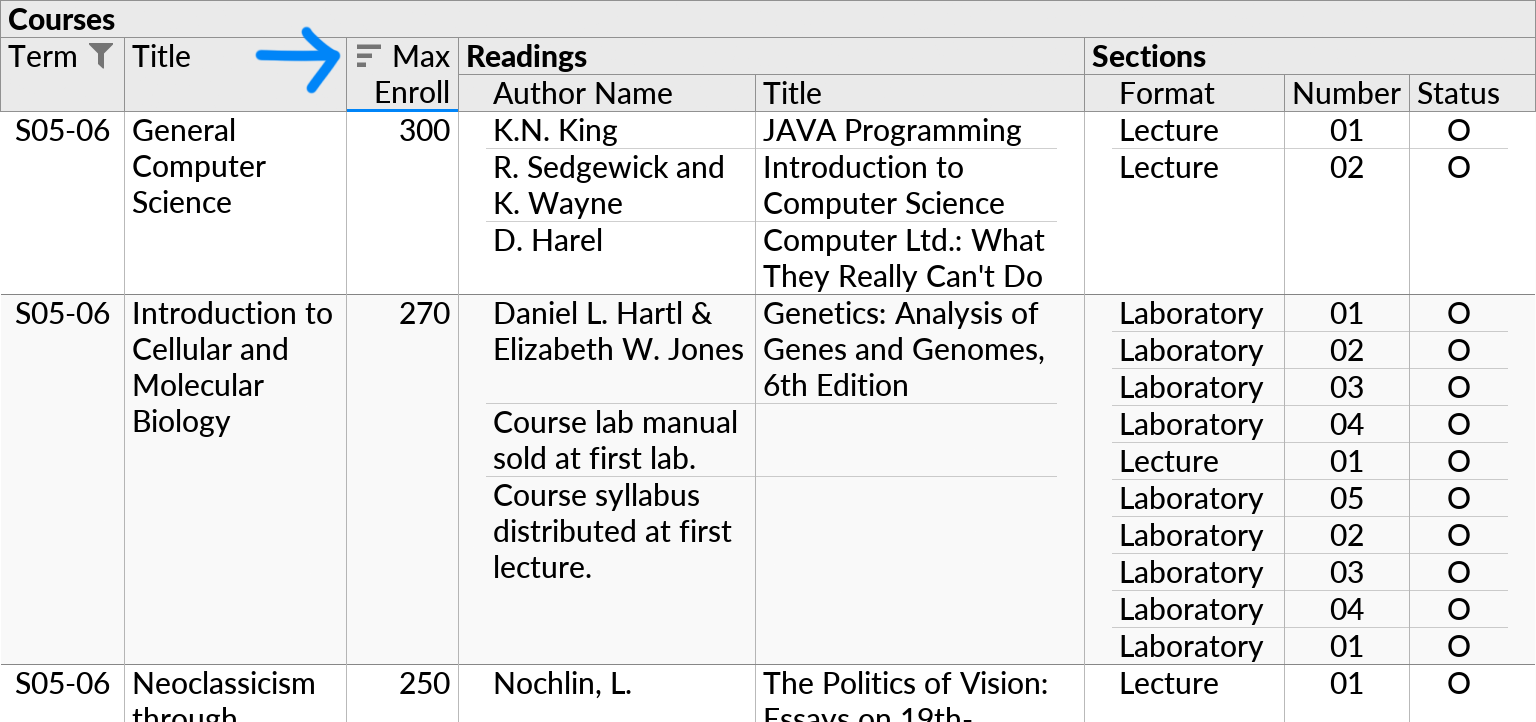
An Ultorg perspective can display data in multiple levels, called subqueries. Sorting affects the subquery containing the sorted field, and all of its descendants.
For example, sorting the perspective below on “Max Enroll” will affect the order of records from the “Courses” subquery, which includes nested lists of “Readings” and “Sections”:
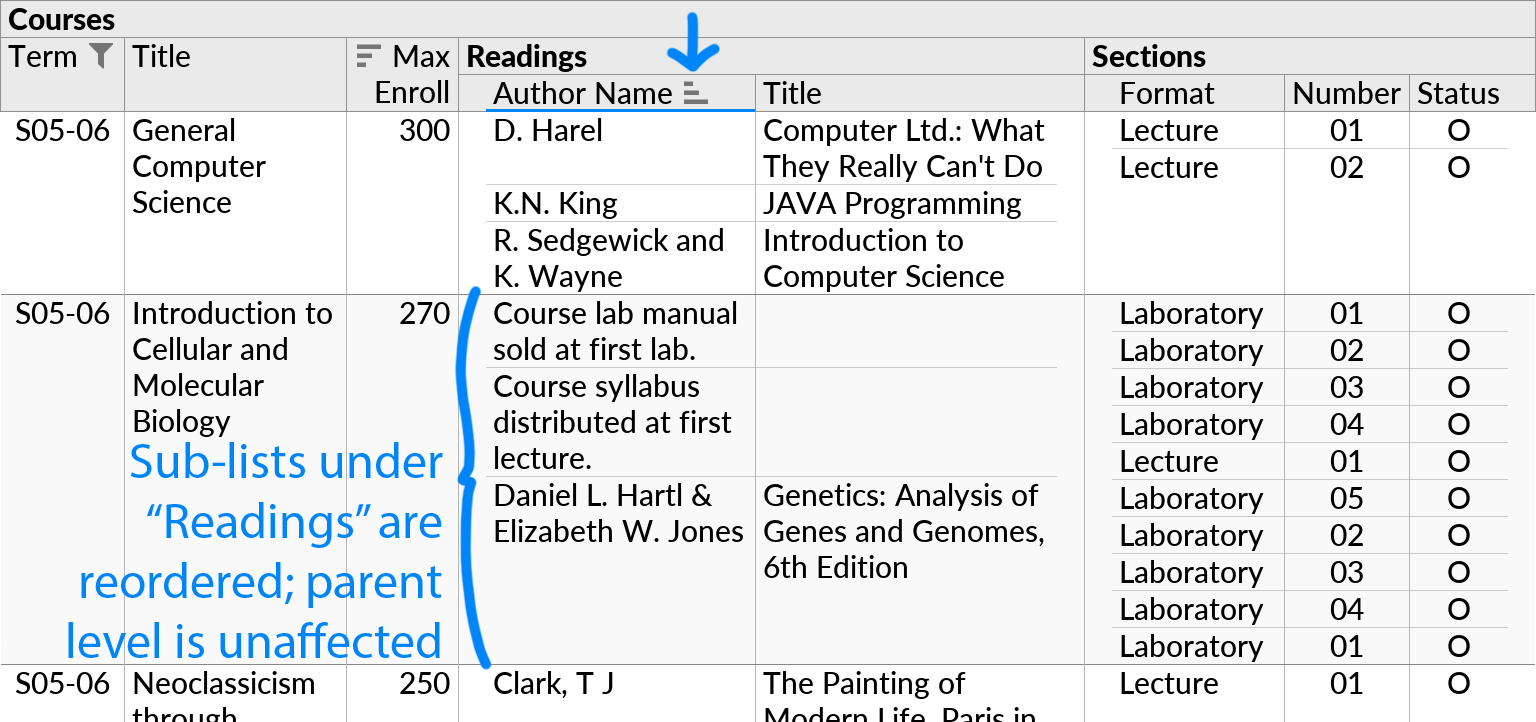
Sorting on a field in a deeper subquery, by contrast, will leave the order of rows in the parent subquery unaffected:
To sort the entire result rather than just a nested subquery, you can build the perspective starting from a different data table (e.g. “Readings”), or use the Move to Root action to reorganize the subqueries of an existing perspective. Or, you can use the Custom Group action to project data from a nested field into a sortable outer subquery.
Single-Row Subqueries
In some cases a sort operation may appear to have no effect, because each sorted subquery currently has at most one record. Ultorg shows an informational message in this case.
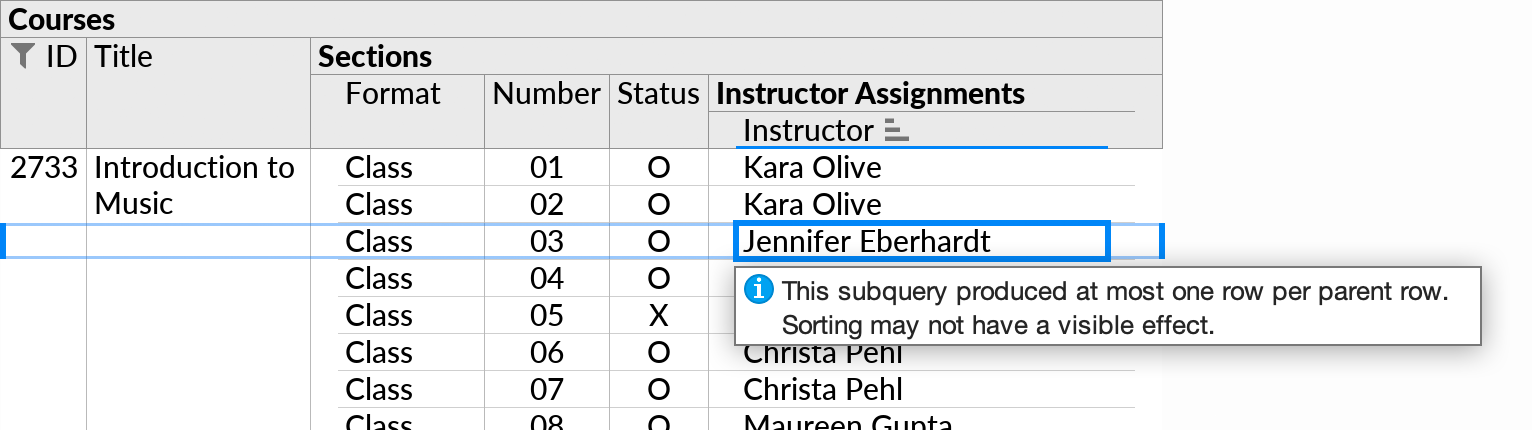
In the example above, the database schema does in fact permit multiple instructors to be assigned to each section, however this case never occurs in the currently displayed result.
In other cases, Ultorg may detect that the subquery's join can never yield more than one row per parent row, neither currently nor in the future. In this case, sorting that is done in the nested subquery will be automatically propagated to the parent.
For example, a list of Documents can be sorted by the last name of each document's associated Owner User, by invoking the Sort Ascending action on the Last Name field:
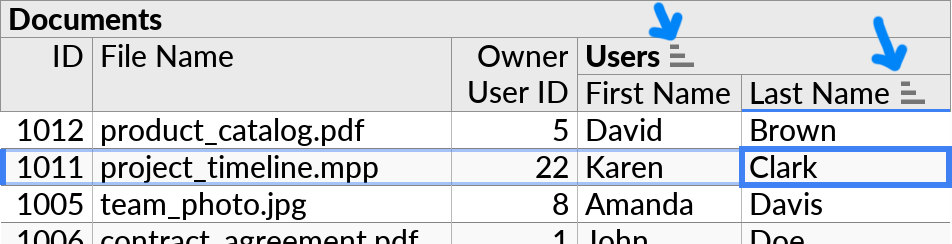
This works because the join between Documents and Users is done on the latter's primary key field, guaranteeing at most one user per document. The propagation of sorting from the Users subquery to Documents is indicated by the sort icon (![]() ) on Users.
) on Users.
Multiple Sort Terms
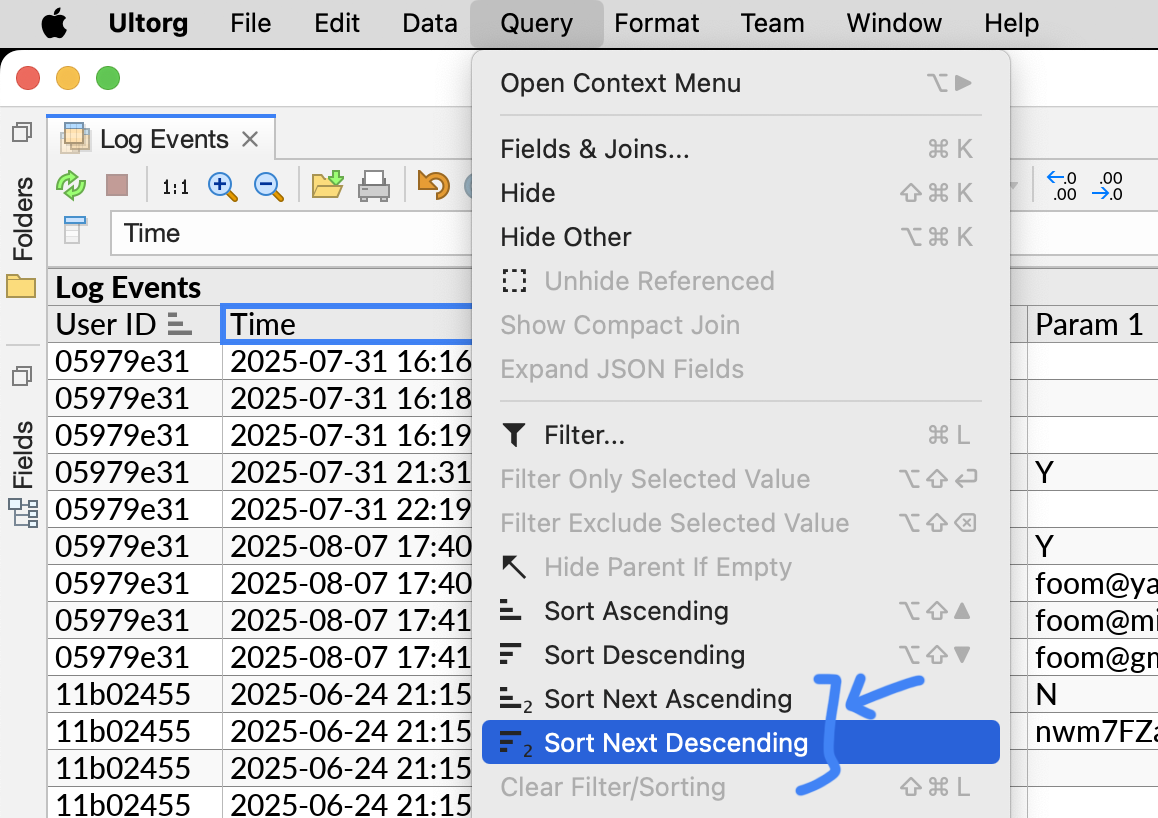
To sort on one field after another:
- Invoke Sort Ascending or Sort Descending on the first field to be sorted on.
- For each subsequent field to be sorted on, place the cursor anywhere in its table column, and click Sort Next Ascending or Sort Next Descending in the Query menu.
The sort terms are indicated by subscripted sort icons (![]() ,
, ![]() 2,
2, ![]() 3 etc.).
3 etc.).

Alternatively, you can select multiple fields at once and invoke Sort Ascending or Sort Descending to sort on the selected fields left-to-right.
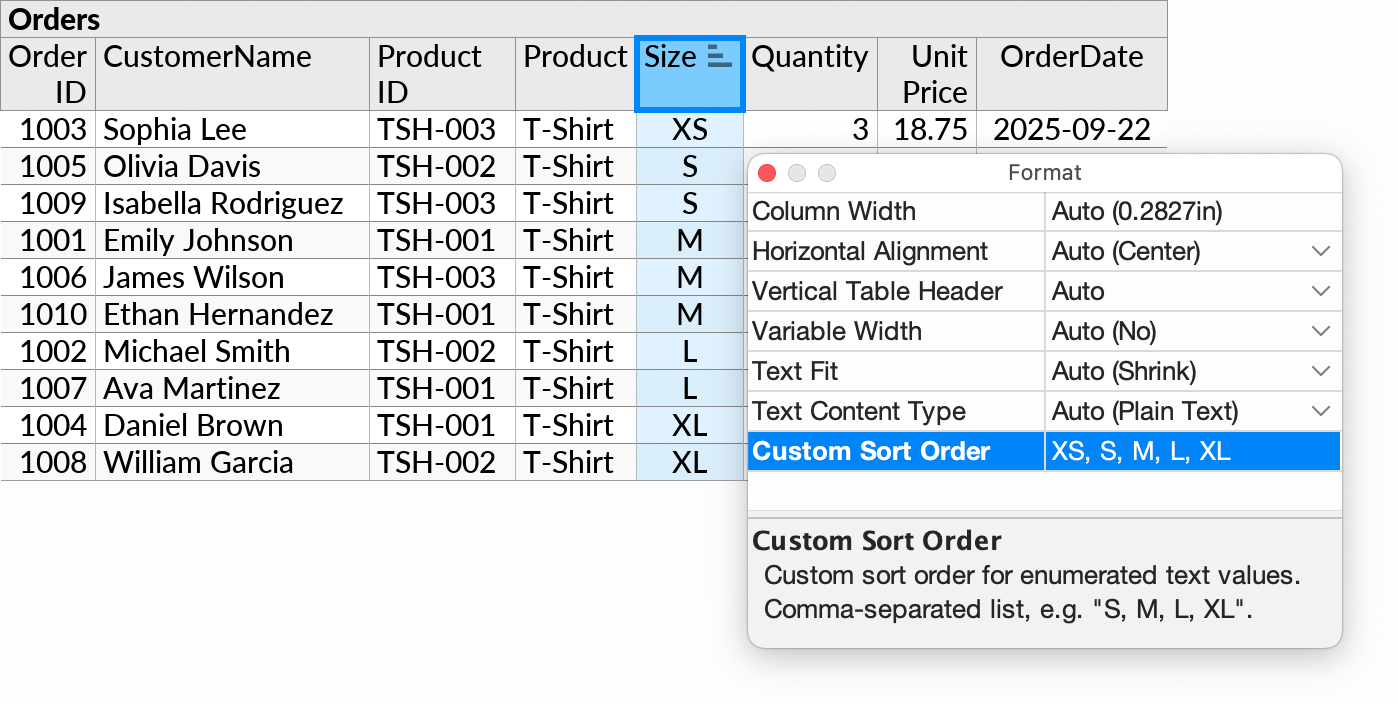
Custom Sort Order
To set a custom order for values in a text field, invoke Sort Ascending on the field and then Format/Options from the context menu. Then edit the Custom Sort Order option. For example, you can enter “XS, S, M, L, XL” to order by T-shirt sizes.
If a value in the comma-separated list contains spaces or commas, you may quote it.
Weekday and Month Names
The Custom Sort Order option is configured automatically when sorting on weekday or month names, or abbreviations thereof, in English, French, German, Portuguese, or Spanish.
In formulas, the result of the weekdayName and monthName functions will automatically sort in chronological order, without use of the Custom Sort Order feature.
Other Details
Null values and empty text strings always sort last, in both ascending and descending mode.
Sorting on text fields is case-insensitive. The collation rules for non-English characters may depend on the data source.
When no explicit sorting is defined, Ultorg may display rows in any order. For subqueries with an associated data table, Ultorg will default to sorting by the primary key.
Filtering
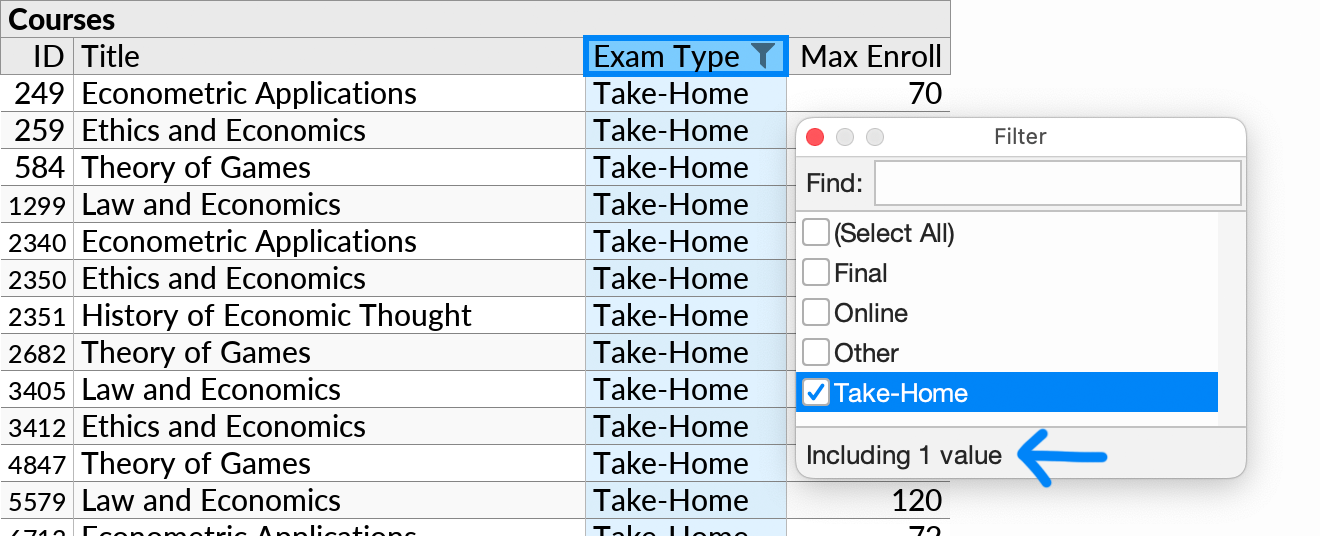
The Filter action opens a popup window with available values for the selected field:

The values are computed in a separate database query when necessary.
Clicking one or more values will activate the filter, and cause the perspective to include only records with a matching value in the selected field.
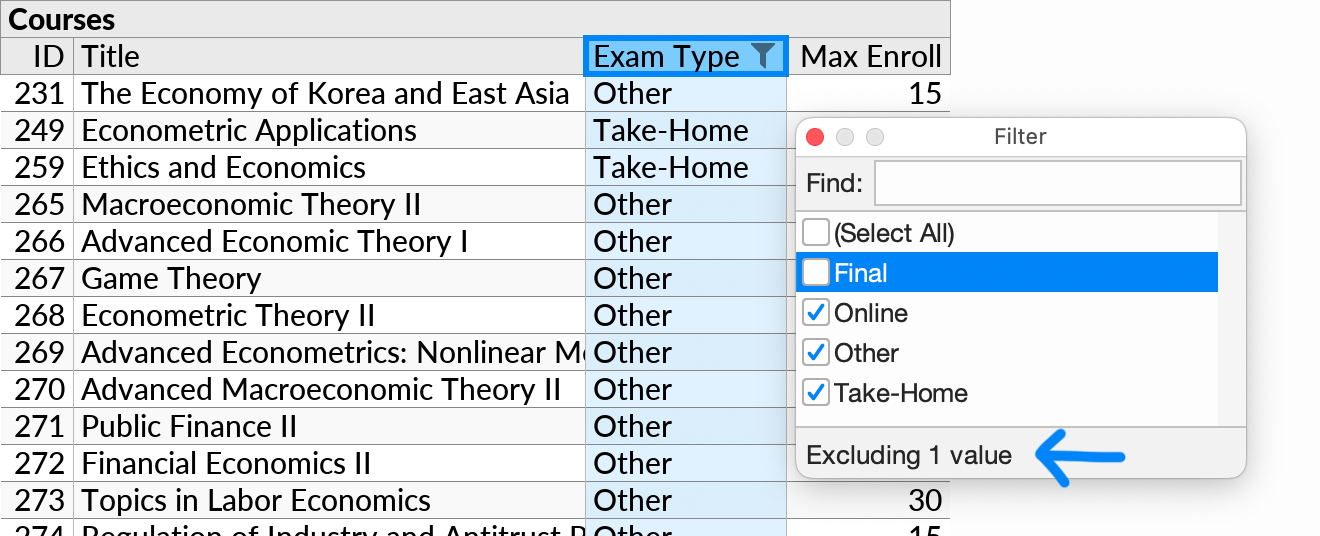
Alternatively, you can include all records except those matching specific values, by clicking Select All first and then unchecking the value(s) to be excluded.
You can press the Up/Down keys to move quickly between the different filter options, and Space to check or uncheck them. The Down arrow key also works to move focus out of the Find box. Checking Select All will clear the filter.
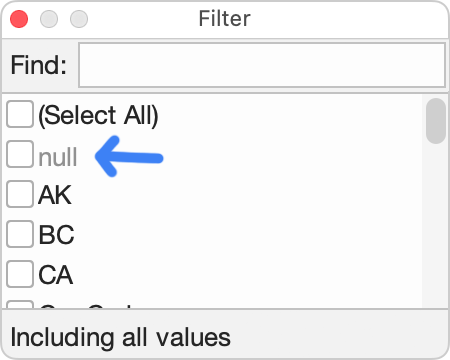
A null value and/or empty text string will appear as a filter option if present in the data, at the beginning of the list.
Searching in Text Fields
You can enter search terms in the Find box to narrow the displayed filter options. Ultorg will show values that contain all of the entered search terms, in any order.

Search terms are separated by spaces. To search for multiple words in a specific order, or to search for spaces, enclose the search term in double quotes:
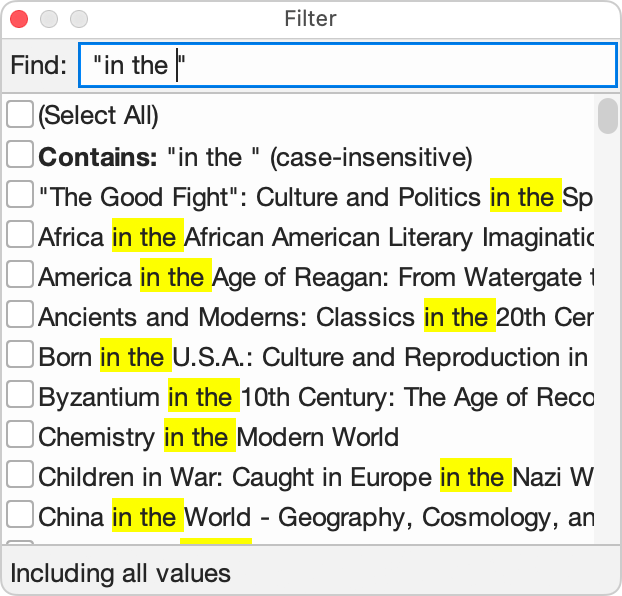
Quoted text may include backslash-escaped characters (e.g. "\n" for newlines), like in formulas.
“Contains” Filters
When search terms are entered, you can either pick specific matching values for the filter, or the Contains option that appears at the top of the list (see above). The Contains option is conceptually equivalent to selecting every matching value, except that the condition is remembered and reevaluated whenever there are other changes in the perspective.
You can include more than one Contains option, by typing a new search term after selecting the Contains option for the first one.
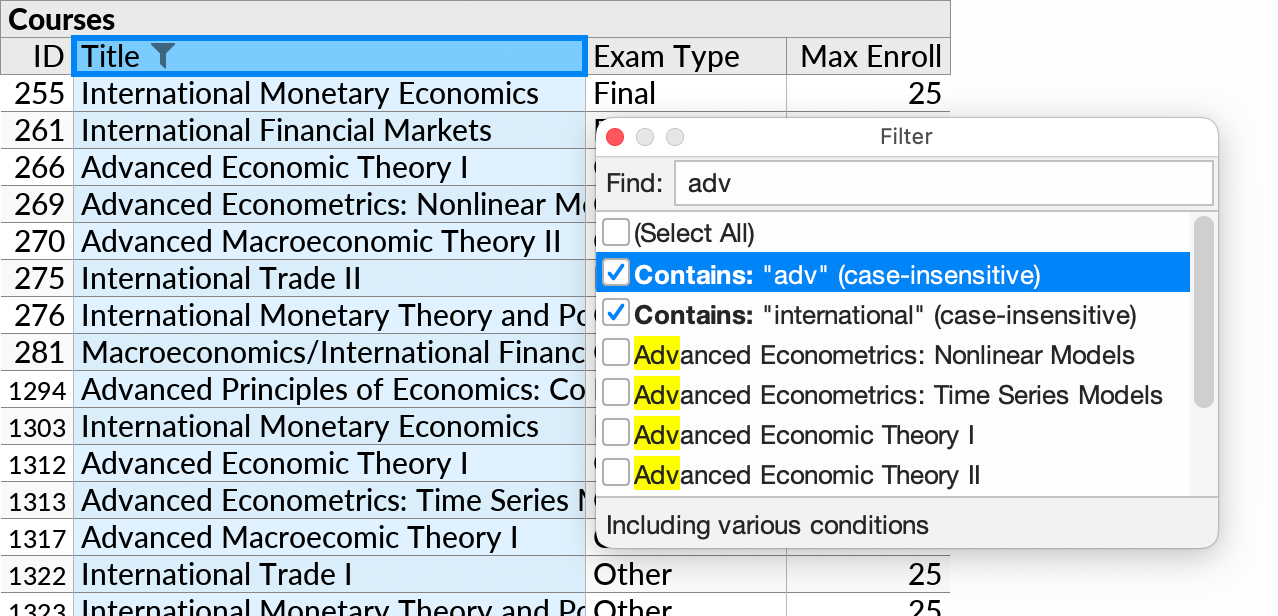
Contains conditions are case-insensitive. Individually selected values, by contrast, require an exact match.
Range Filters
For numeric fields, the range filter conditions At least and Below become available whenever you enter a number in the Find box:
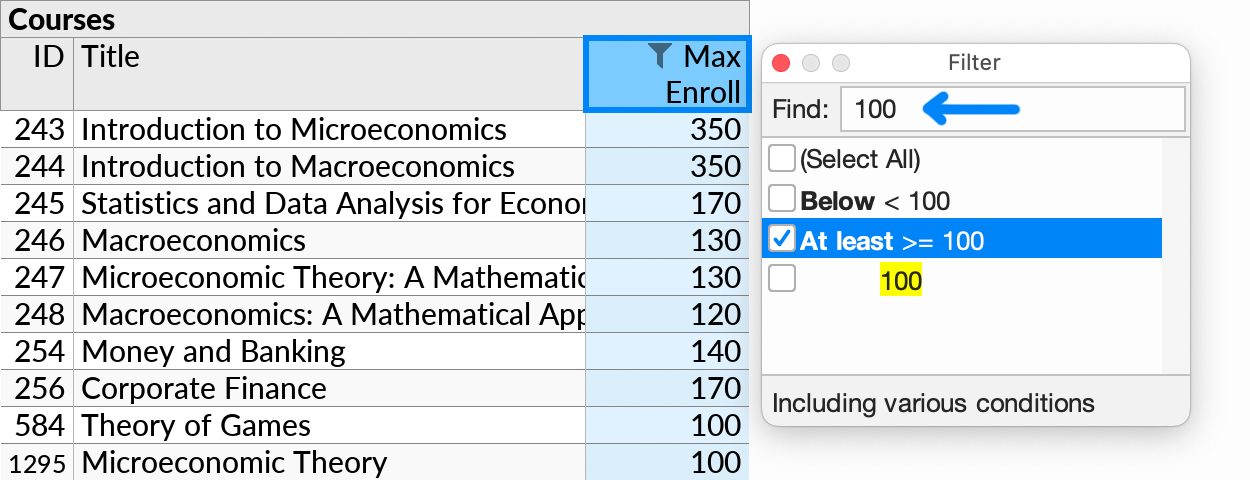
By selecting one of these options, you can filter e.g. to show only courses with an enrollment limit of at least 100 students.
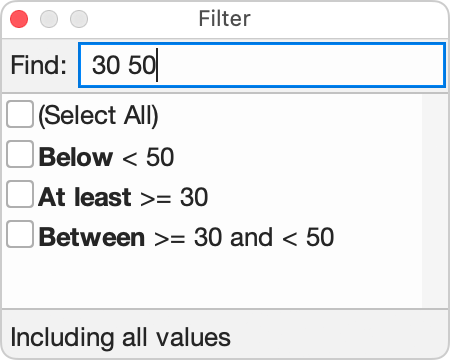
Typing two numbers, separated by a space, adds the Between option:
Date and Time Ranges
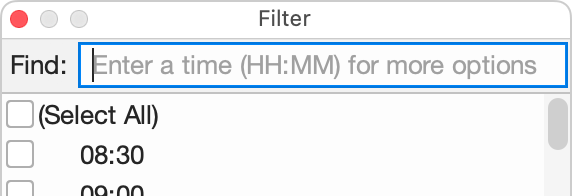
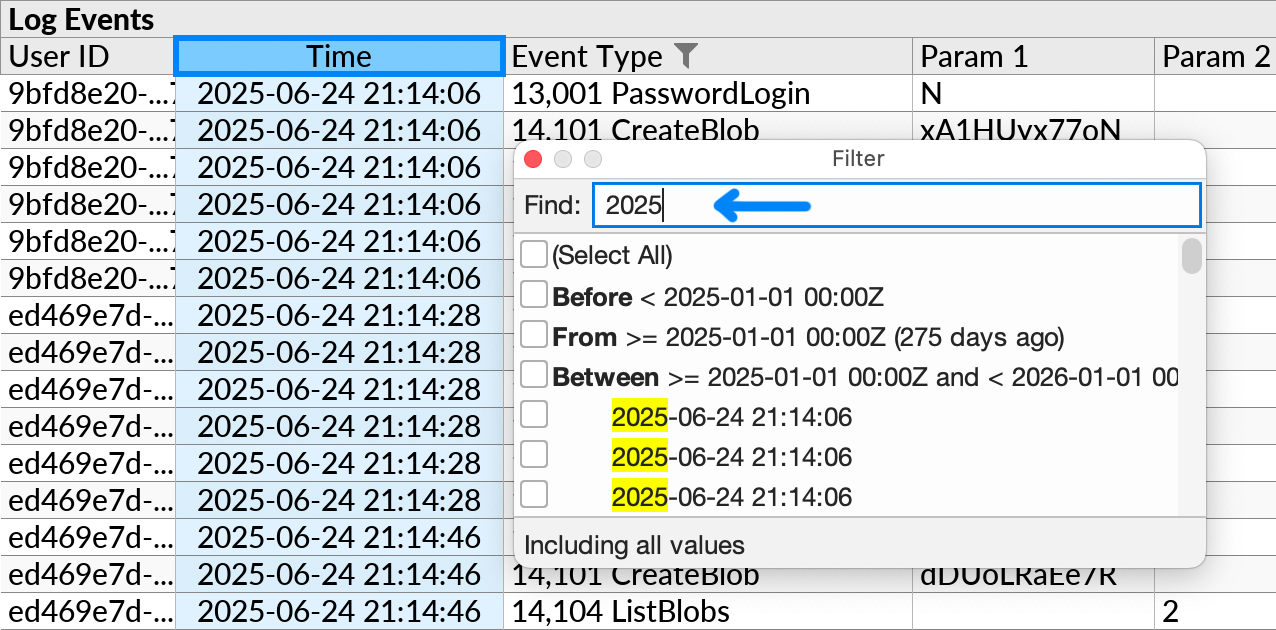
Range conditions work similarly for date, time, and timestamp fields. Enter one or two values of the appropriate type to expose From, Between, and Before conditions.

The Find box shows the expected format in grey initially.
For date or timestamp fields, you can enter a partial date, such as “2025” or “2025-04”, to set the range to a specific year or month.
You can also enter e.g. “30” as a shortcut for the date 30 days in the past. See details here.
Filters over Multiple Fields
The Filter action works with multiple selection. You can, for example, select two separate “FirstName” and ”LastName” fields and then invoke Filter to pick specific combinations of values for the two fields:
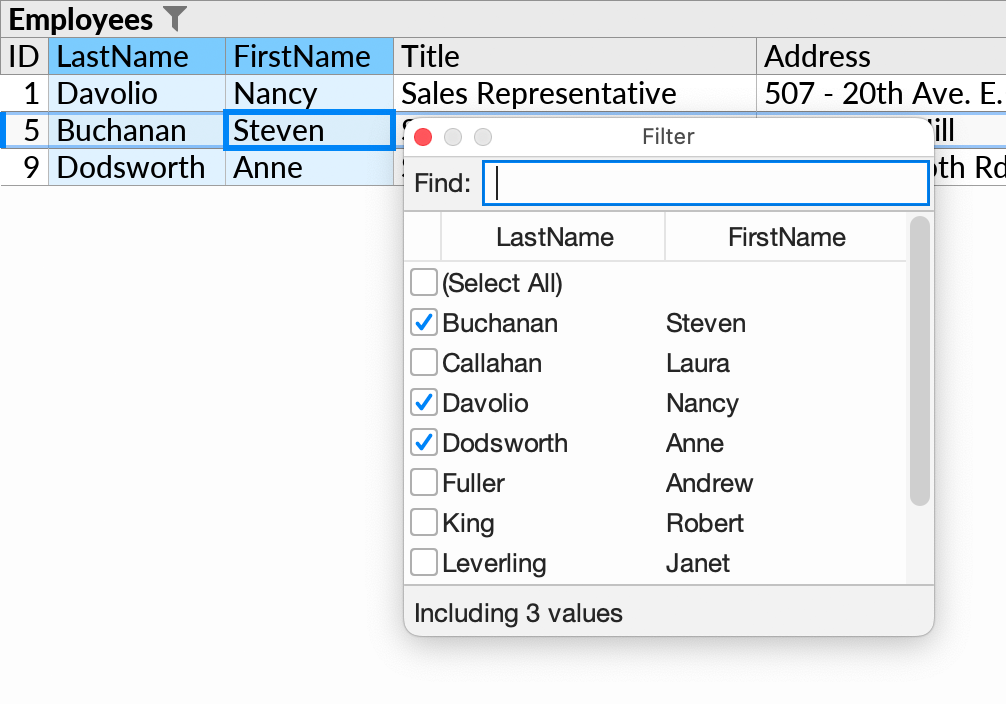
The resulting filter becomes associated with the subquery that encloses all of the selected fields. For example, the filter above appears with an icon (![]() ) on “Employees”.
) on “Employees”.
If the Filter action is invoked on a subquery (bold heading) without an existing filter, the filter will be defined in terms of the table's primary key column(s). This can be useful if you wish the filter to include or exclude entire table rows, rather than just specific primitive values.
Other Filter Conditions
The Filter popup handles the most common kinds of filter conditions. To filter on an arbitrary condition, you can filter on the result of a formula.
Certain non-standard data types, such as the cidr (IP address) data type on PostgreSQL, may give an “Filtering not supported on this data type” error in Ultorg's Filter popup. You can work around this by using the concat function in a formula to convert the values to text, and then filtering on the text values instead.
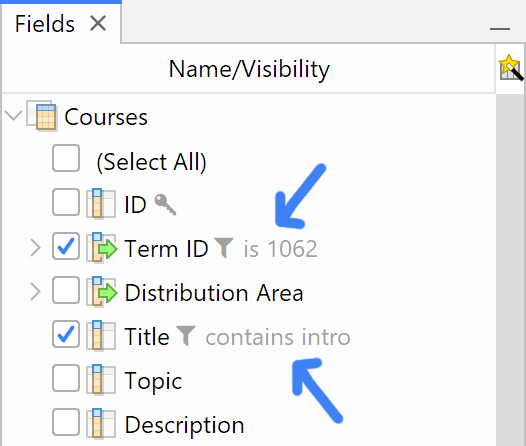
Sidebar Indications
A summary of filter state is shown in the Fields sidebar:
Filter Only/Filter Exclude
The Filter Only and Filter Exclude actions lets you filter on, or filter out, a specific value without having to find it first in the Filter popup. Right-click a cell containing a value, and invoke the relevant action from the context menu. Or, use the indicated keyboard shortcuts. There is a quick video demo of this feature here.

These actions work with primitive values of all standard types, including null values, empty strings, foreign key values formatted as a compact join, and values in a crosstab header.
Filters set via Filter Only/Exclude work the same as filters set from the regular Filter popup. Use Clear Filter to remove the filter (Ctrl+Shift+L or ⇧⌘L on Mac).
Filter Exclude will properly adjust any existing filter that may be present on the same field.
The keyboard shortcut for Filter Only (Shift+Alt+Enter) is similar to that of Open Details (Alt+Enter), as the two actions both act to drill down in the data.
Hide Parent If Empty
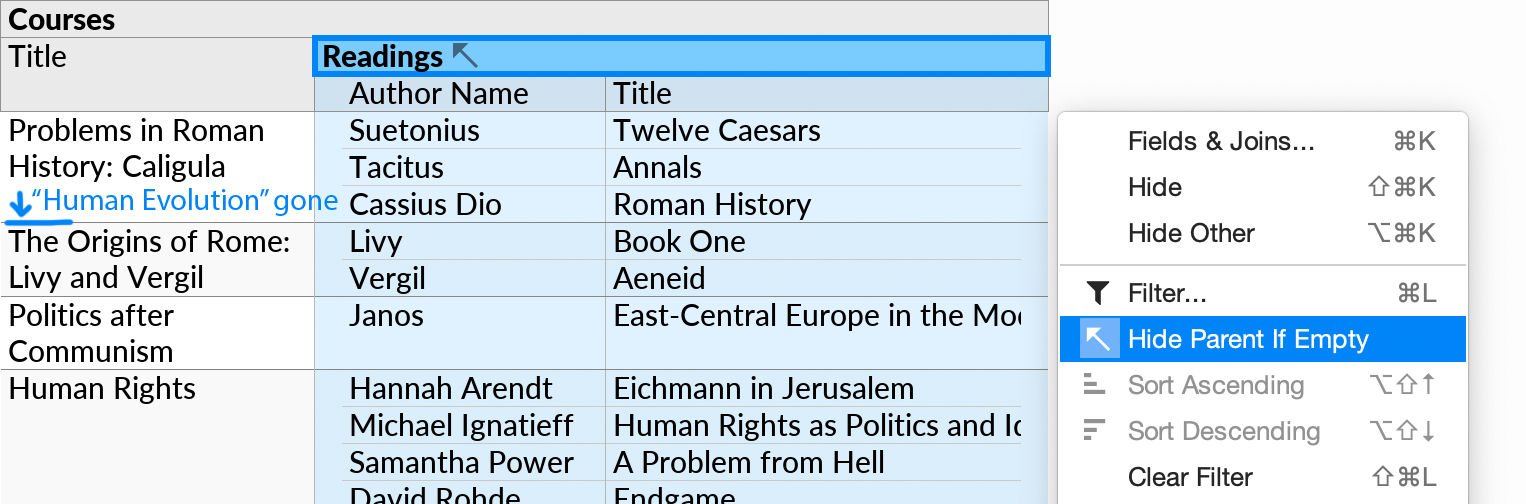
The Hide Parent If Empty setting (![]() ) controls the treatment of empty groups at a given subquery, and the effect of filters in nested subqueries. Consider the following example:
) controls the treatment of empty groups at a given subquery, and the effect of filters in nested subqueries. Consider the following example:
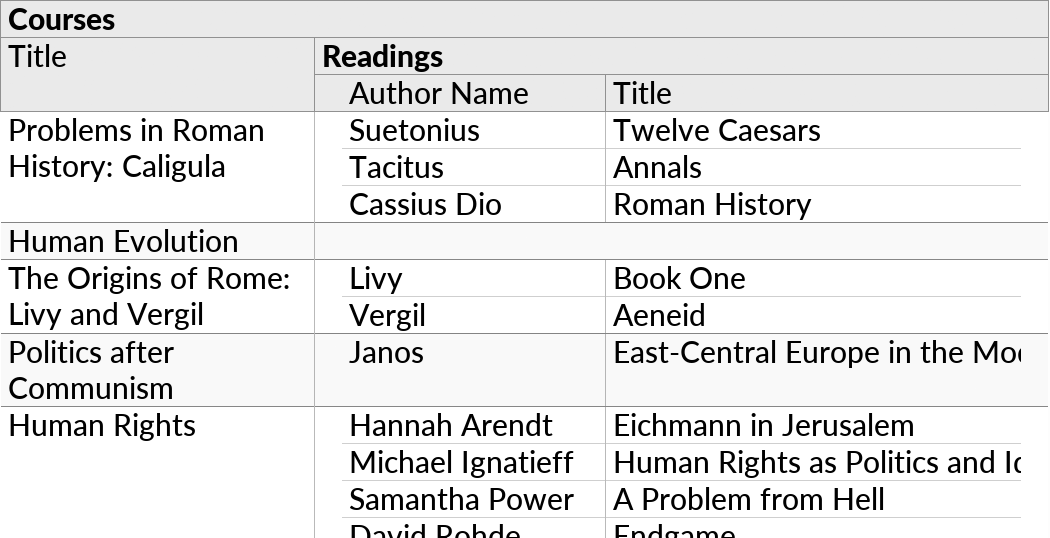
Here, Ultorg is visualizing a join between two data tables, Courses and Readings. The course “Human Evolution” has no readings in its reading list. By default, the course will be shown with an empty list at the Readings level, as seen above.
If we open the context menu at the Readings level and enable Hide Parent If Empty, however, then only courses with at least one reading will be returned:
At the SQL level, the behavior of the Hide Parent If Empty setting is to switch from a left join (or left outer join) to an inner join.
Automatic vs. Manual Use
The most common use for the Hide Parent If Empty setting is to propagate the effect of a filter in a nested subquery. This happens automatically whenever you use the Filter action. For example, filtering on reading titles will automatically enable Hide Parent If Empty on “Readings”, so that only courses with at least one matching reading will be displayed:
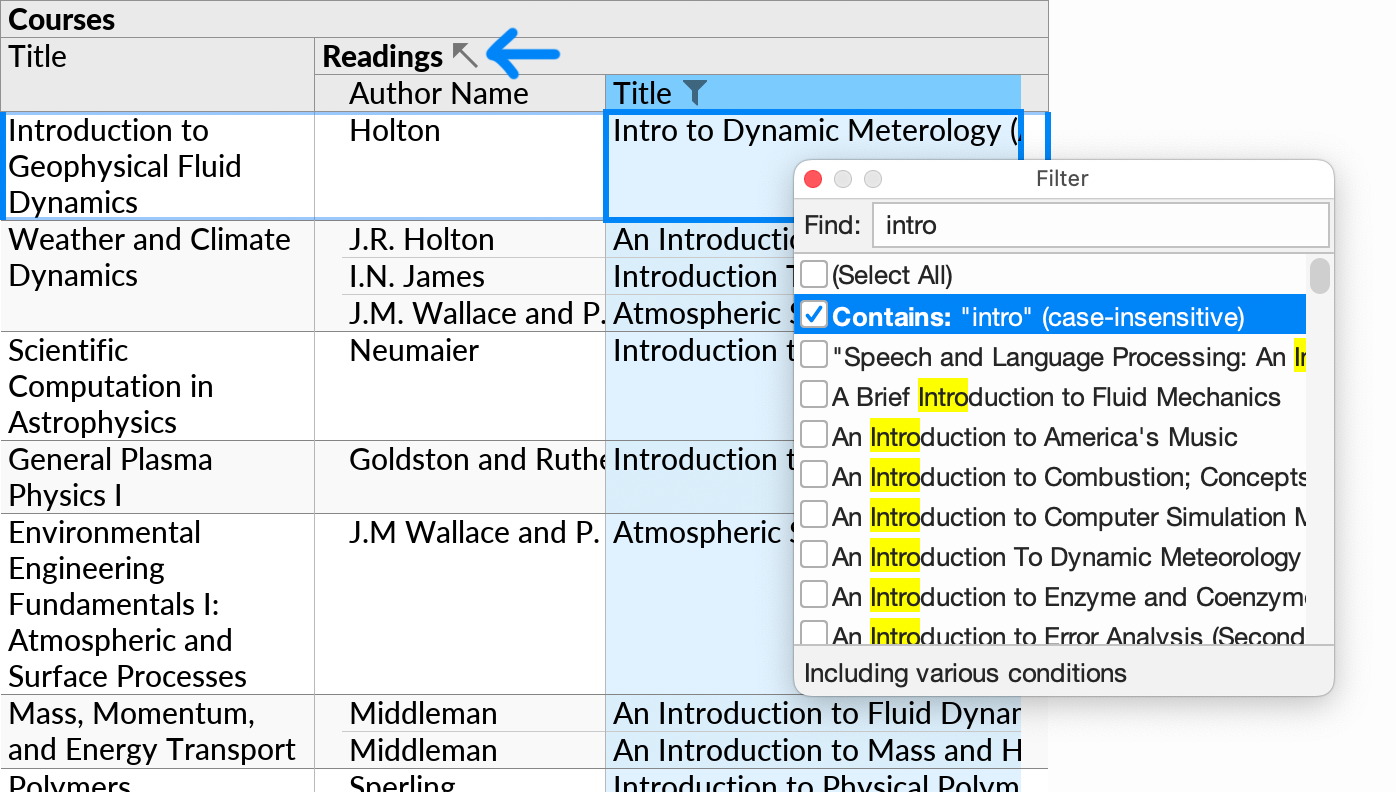
Most of the time you will not need to change the Hide Parent If Empty setting manually. Though you could do it here, for example, if you wished to show all courses, but only readings with “intro” in their title. (You would see many courses with empty reading lists in that case.)
In some cases, Ultorg can deduce that a subquery will never be empty. If so, the Hide Parent If Empty action will appear disabled.