Application Overview
Ultorg is a downloadable desktop application that works on Windows, MacOS, and Linux. You can find installation instructions for your operating system on the Download page.
When you first start Ultorg, you will be prompted to activate a trial or paid license. See License Management for more information. Additional installation topics are covered here.
The Main Window
Here are the main parts of Ultorg's user interface:
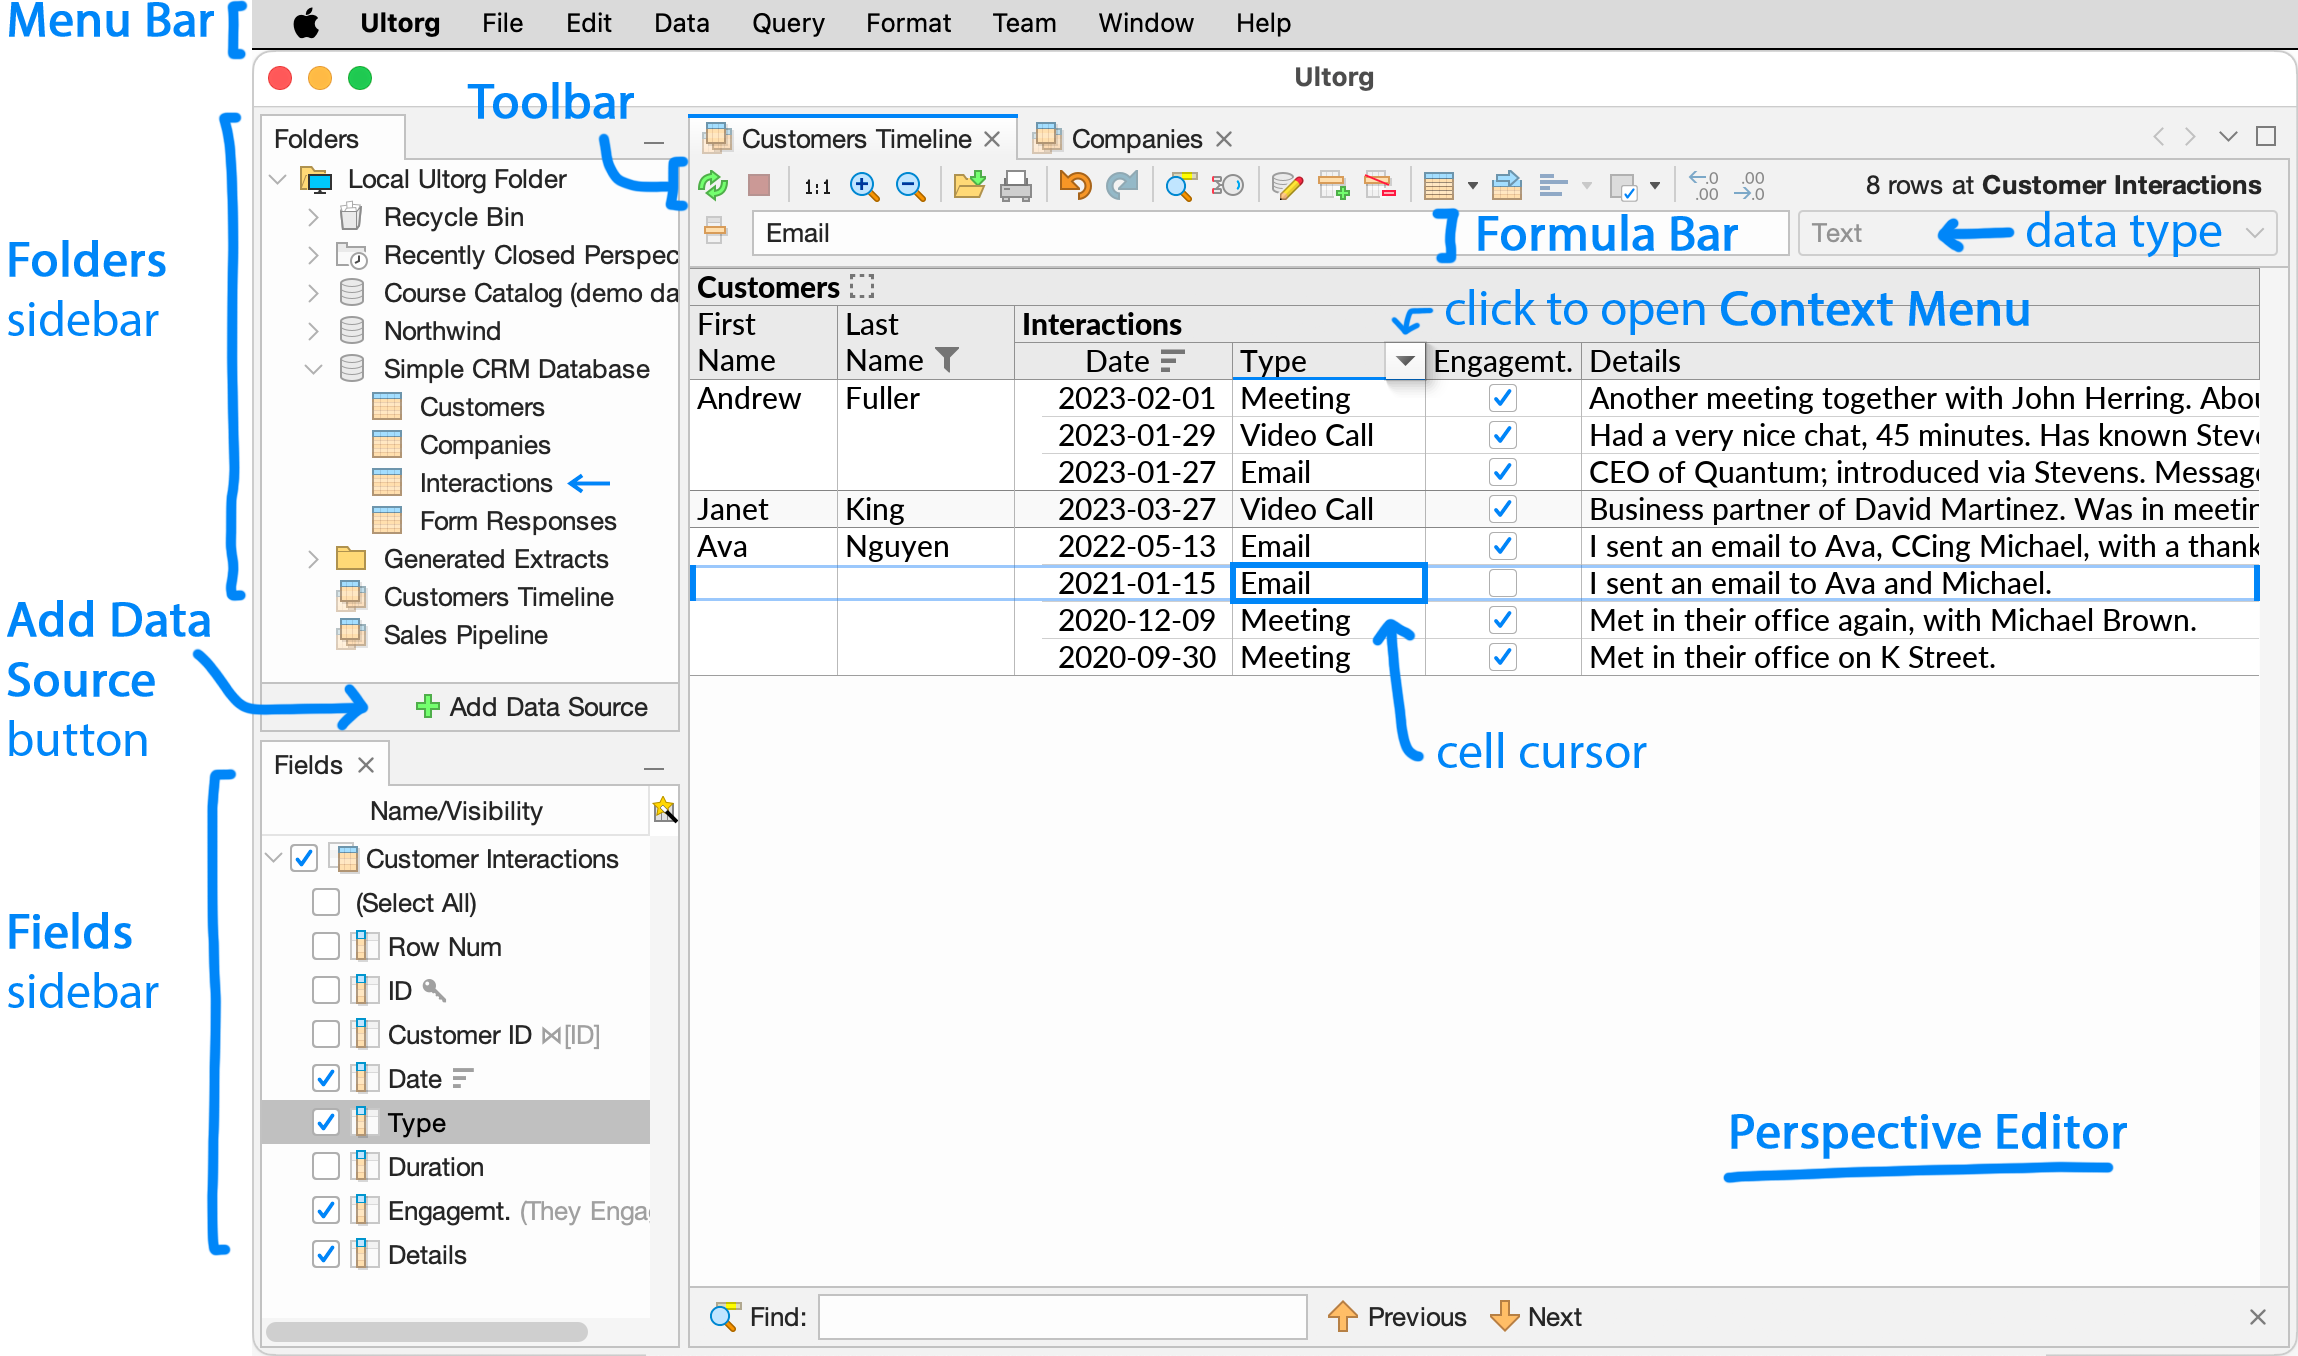
In a typical Ultorg session, the different areas are used as follows:
- The Add Data Source button lets you connect to a data source. See Connecting to Data for more information. Data sources remain saved across application restarts.
- The Folders sidebar shows added data sources (
 ) and their associated data tables (
 ), as well as any saved perspectives (
 ) and data extracts (
 ). Items shown here can be organized in folders (
 ). You can right-click items to show available actions.
Double-click a table to show its content in a new perspective.
- The Perspective Editor area shows tabs with open perspectives. A perspective is a visual database query that pulls data from tables in one or more data sources.
In Ultorg, most actions are invoked by interacting directly with the data in a perspective. The most common actions are exposed in the Context Menu (
 ), and in the Toolbar. See Basic Interactions for more details.
You can Undo (
 ) and Redo (
 ) most actions.
You can adjust the font size with Ctrl+Plus/Minus, or with the scroll wheel while holding down Ctrl. (On MacOS, use the Command key intead of Ctrl.)
- The Fields sidebar shows the structure of the currently selected perspective, from either the perspective editor or the Folders sidebar. This includes tables, joins, and table columns that are either visible or available in the perspective.
You can show additional information about each field by clicking the column selection button (
 ) in the corner.
Perspective Editor
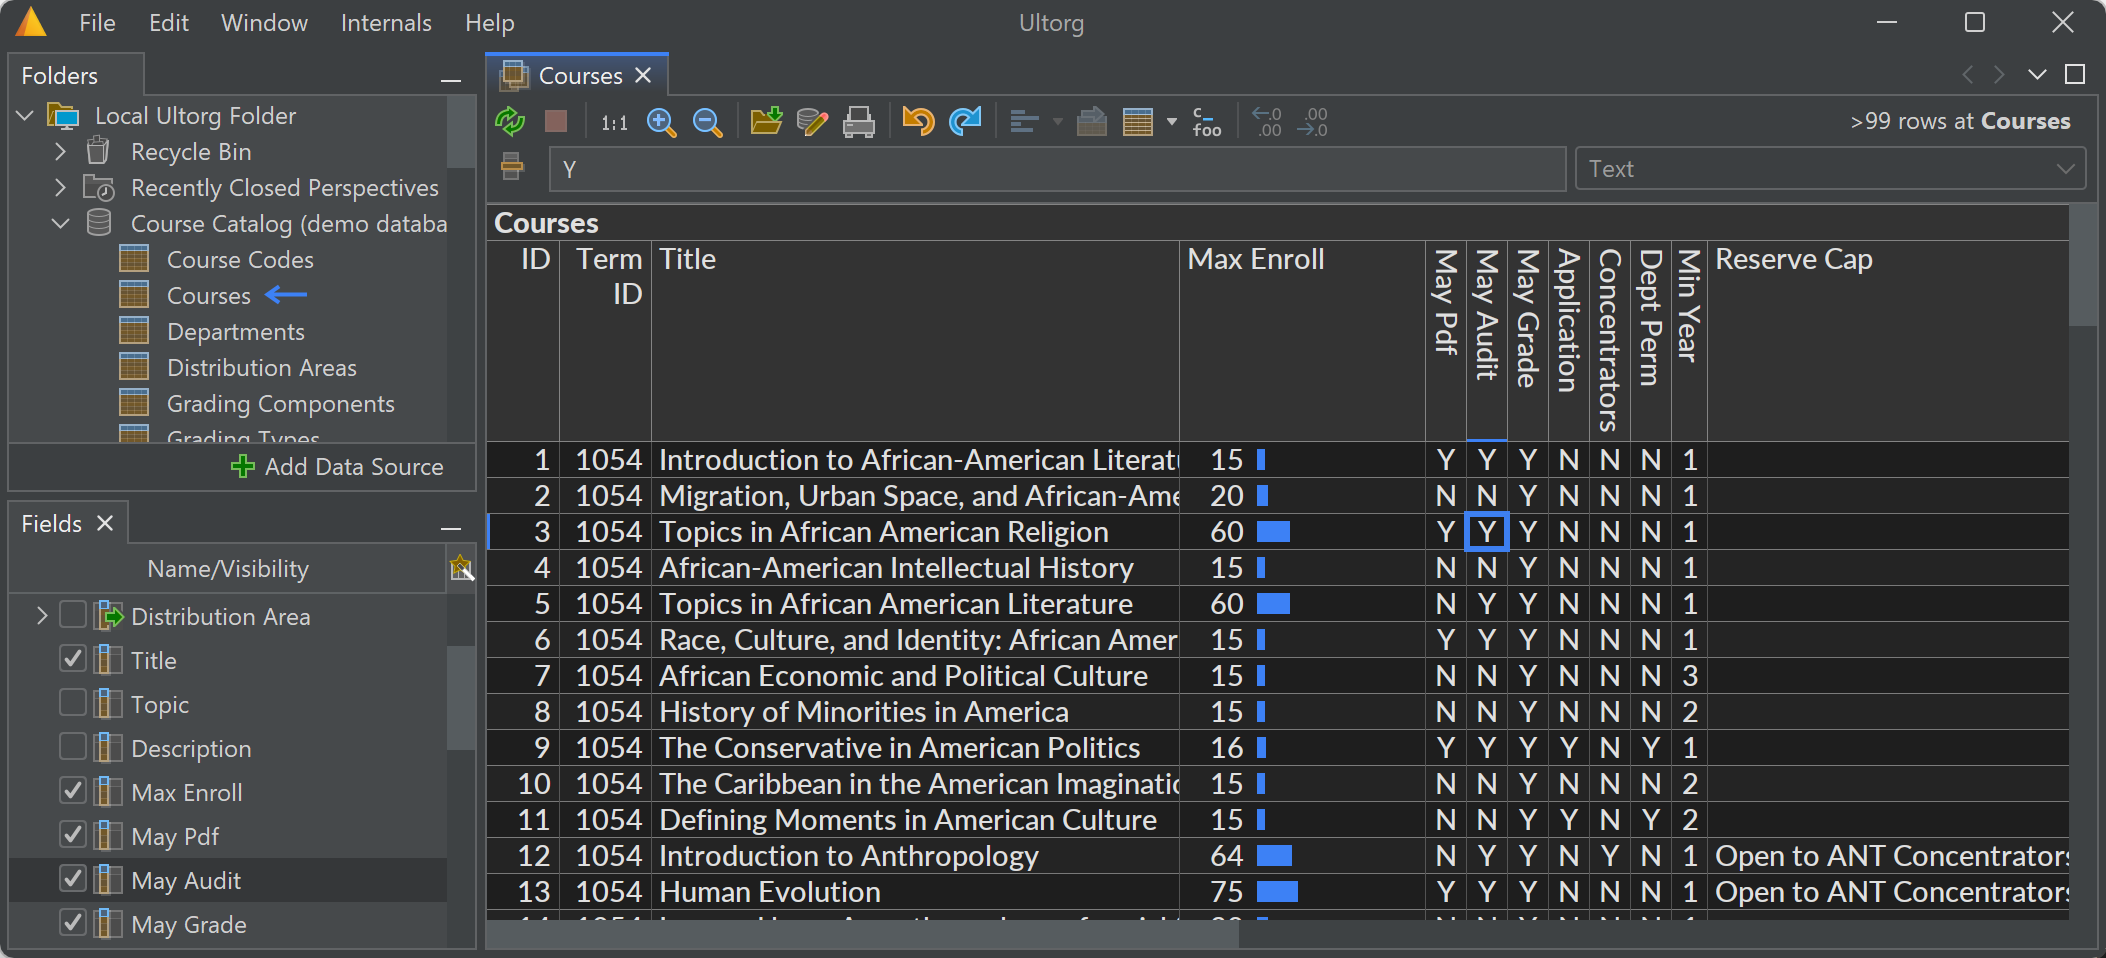
The perspective editor has a spreadsheet-like cell cursor. Several indications relate to the currently selected cell:
- The Formula Bar shows the data value (
 ), formula (
 ), or field name (
 ) in the currently selected cell. You can edit these either from the formula bar or directly in the cell.
- Next to the formula bar, the data type of the current field is indicated.
- In the Folders sidebar, a blue arrow (
 ) indicates the table that provides data for the currently selected cell.
- In the Fields sidebar, the field of the currently selected cell is highlighted.
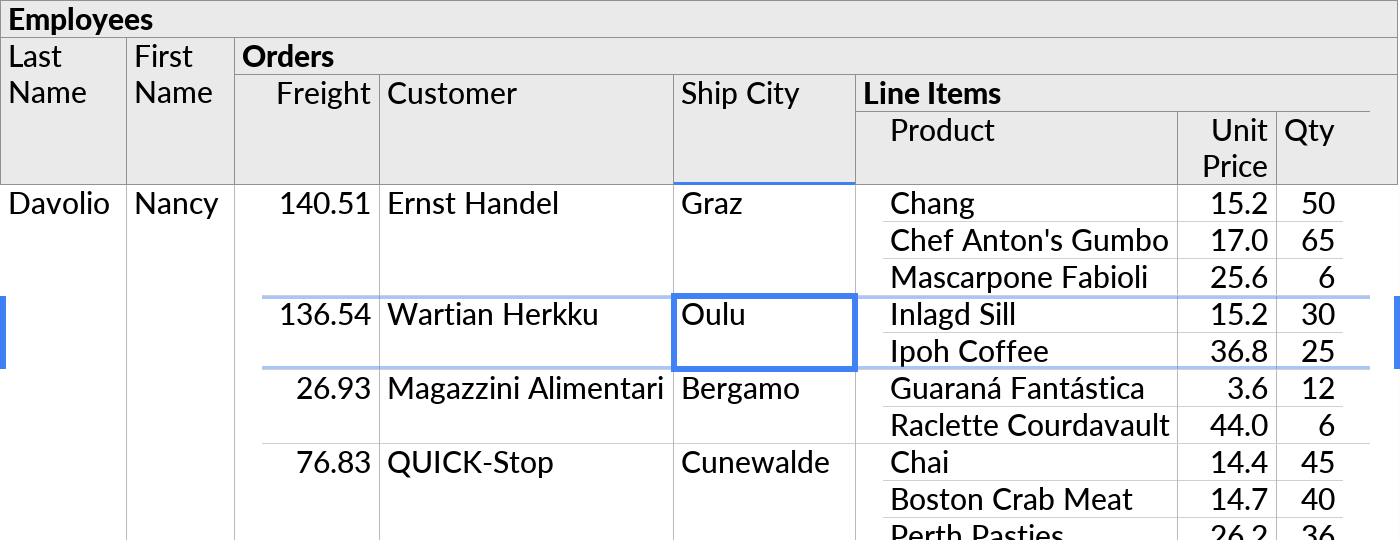
In table layouts, a faint highlight is also shown around the current row, to aid readability. Pressing Escape will hide the highlight and other overlay graphics temporarily.
Menu Bar
The Menu Bar contains a complete summary of Ultorg's functionality.
The most common actions are also found either in context menus or the toolbar.
Window System Options
Dark Mode
For night owls, a dark color scheme is available from Window→Dark Mode in the menu bar.
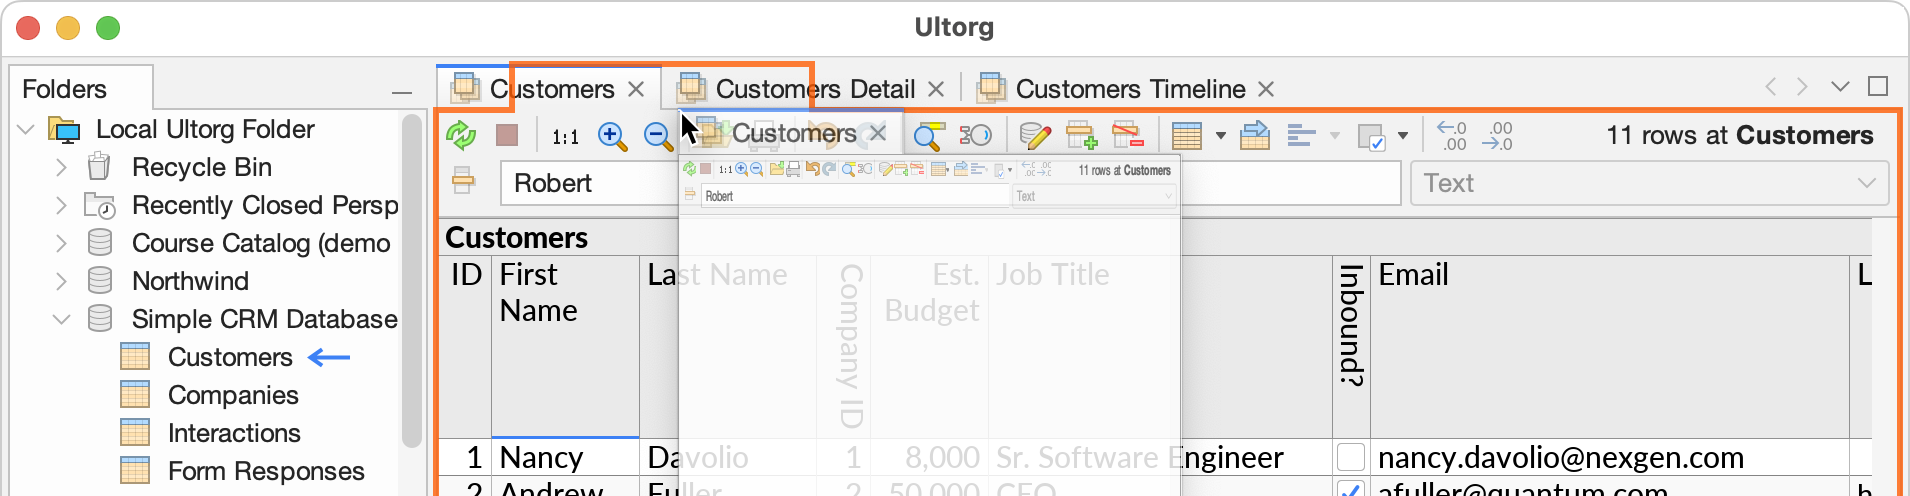
Full-Screen, Split-Screen, and Multiple Monitors
You can drag perspective tabs to arrange a split-screen, or to undock some perspectives to a different monitor:
Other options are available in the Window menu, or in the context menu that is shown when you right-click a tab. For example, you can hide the toolbar or sidebar panes. To restore the default arrangement, use Window→Reset Windows.
The Open Details action (Alt+Enter) automatically opens a form in a split-screen configuration.
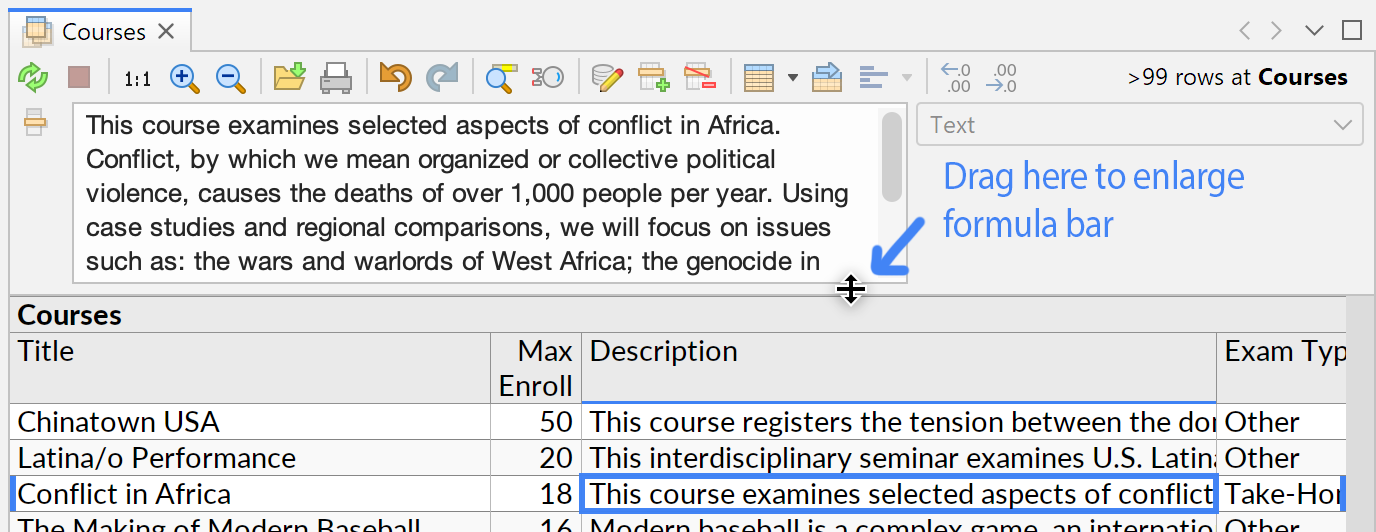
Resize Formula Bar
You can drag the formula bar to enlarge it, like in Excel or Google Sheets:
Expanded Cell Editor
You can press Ctrl+Enter (⌘⏎ on Mac), or Edit→Edit Cell in Expanded Editor, to see the contents of the currently selected cell in a dedicated popup window. In this window, keys such as Enter and Page Down work like in a regular text editor, and will not disturb the cell selection.
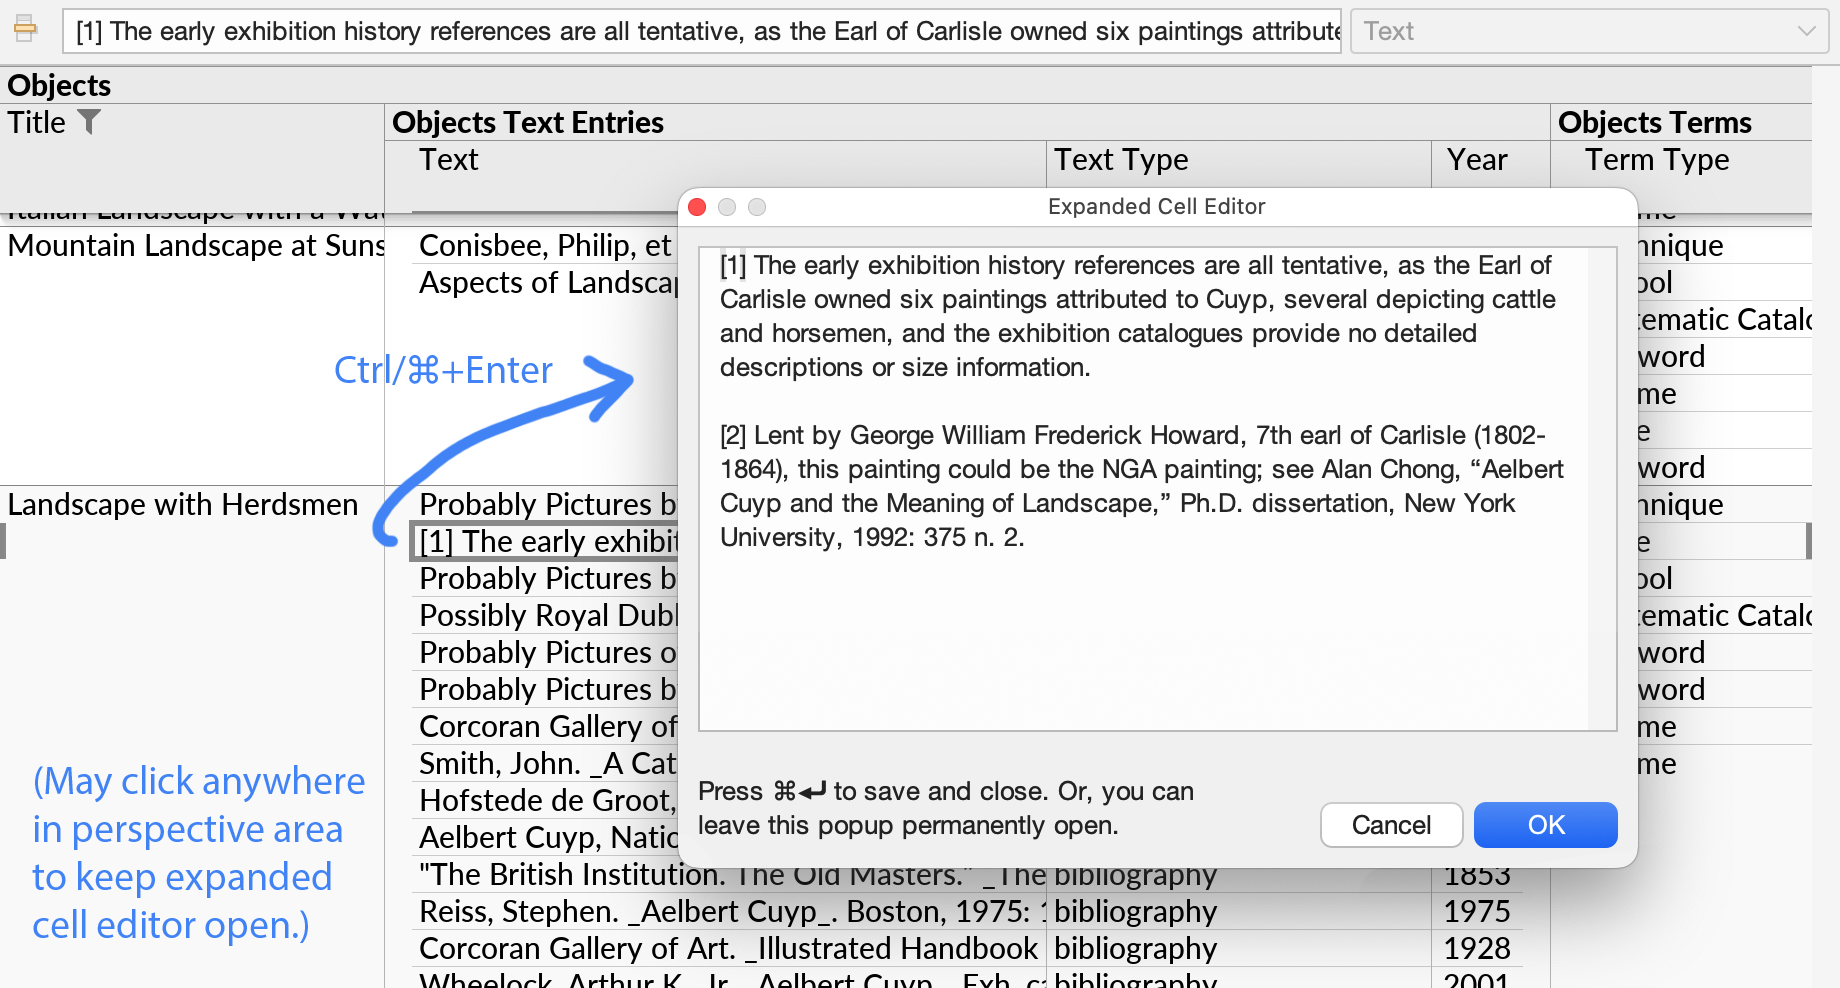
The expanded cell editor can be used for either viewing or editing. Press Ctrl+Enter again to close the editor. Alternatively, you can leave the editor open or move it to another screen, and use it as a way to see the contents of whichever cell is currently selected.
When a formula is selected, the Expanded Cell Editor shows the result of the formula rather than the formula itself.