 PostgreSQL
PostgreSQL is a popular open source relational database server. It is often the database of choice for new software projects. Ultorg has dedicated support for PostgreSQL and its SQL dialect.
Connecting
To connect Ultorg to a PostgreSQL database, click Add Data Source→Connect to Database.

Then select PostgreSQL from the Driver dropdown, and click Next.
Then, enter your connection details.
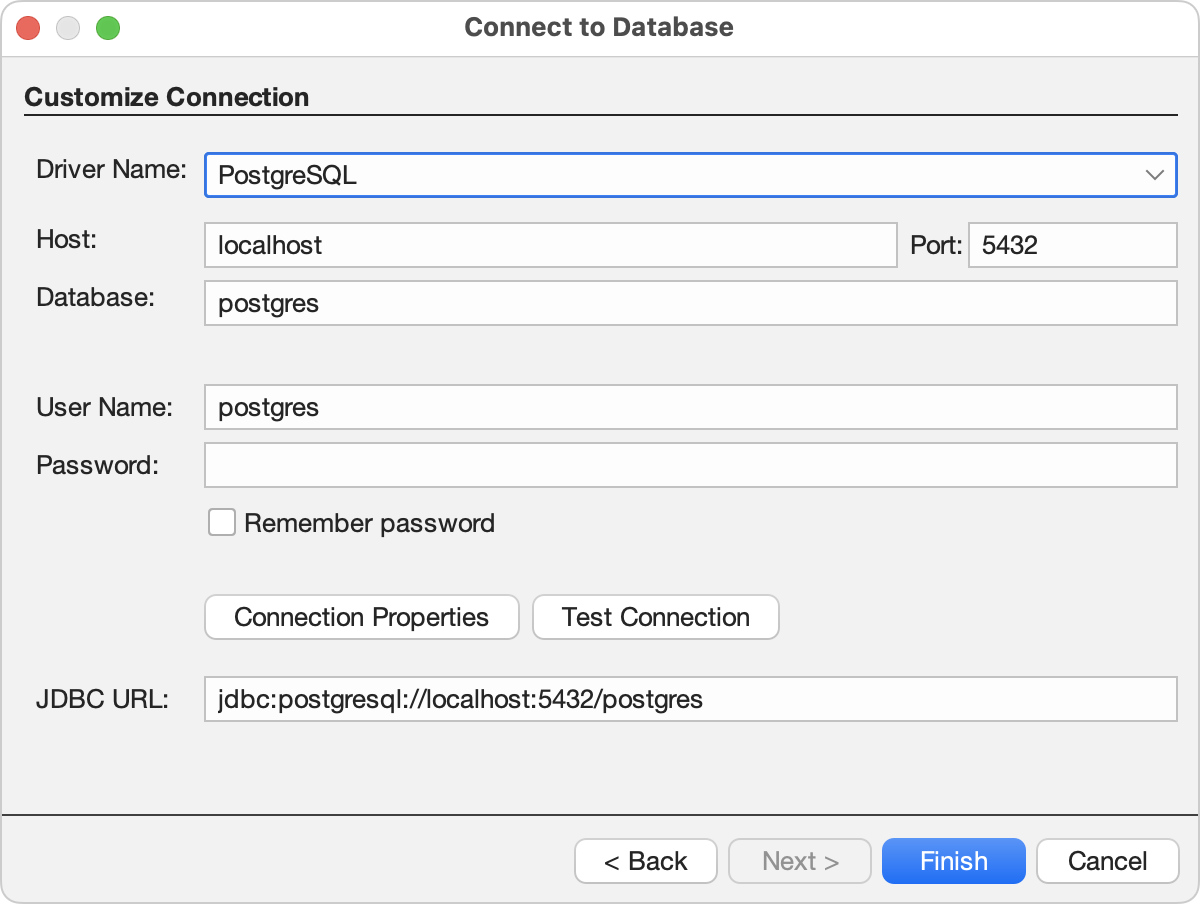
The connection-related fields are as follows:
- Host: The host name or IP address of the PostgreSQL server.
If you are using an SSH tunnel, follow these instructions and enter localhost here.
- Port: The port number to connect to; typically 5432.
- Database: The name of the database to connect to.
In some cases, the relevant database name is postgres, or the same as the user name. Custom names are more common.
In PostgreSQL terminology, a server is a database cluster which may contain multiple databases, but a network connection is always made to one specific database. If you need to connect to multiple databases, create one Ultorg data source for each.
- User Name: The user name to log in with.
- Password: The password to log in with. For some authentication methods, the password should be left blank.
- Connection Properties: Click to set additional parameters that may be required to authenticate your connection. See the PostgreSQL JDBC driver documentation here. Parameters may be specified either here or as part of the JDBC URL (next bullet).
If you need to configure SSL certificates, see the additional instructions below.
- JDBC URL: A connection string constructed from the Host, Port, and Database fields. You can customize this string as per the PostgreSQL JDBC driver documentation.
You can click Test Connection to verify your settings. Last, click Finish.
In the Folders sidebar, your data source (![]() ) will appear with available tables (
) will appear with available tables (![]() ) underneath:
) underneath:
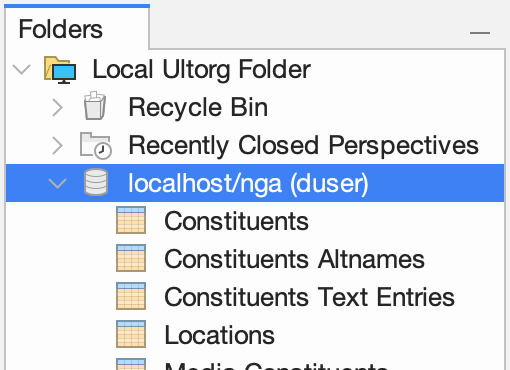
Double-click a table to open it in a new perspective.
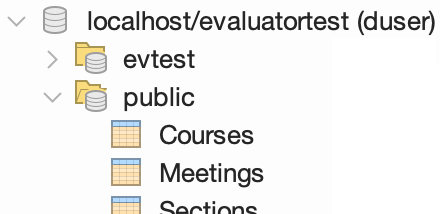
If your database has multiple schemas, tables will appear in schema folders (![]() ).
).
If your connection appears to succeed, but you get a no tables found message, then verify that you are using the correct database name, and that your user has USAGE rights on relevant schemas. You can right-click the data source icon (![]() ) and click Edit Data Source to try a different database name.
) and click Edit Data Source to try a different database name.
Integrated Windows Authentication (SSPI)
For Windows clients, some PostgreSQL servers may support passwordless login using your existing Windows credentials (SSPI authentication, often used with Active Directory). To connect to an SSPI-enabled PostgreSQL server from Ultorg, use your Windows user name and an empty password. No special configuration is needed.
The required DLL file and libraries are bundled with Ultorg 1.6.2 and later.
SSL Configuration
PostgreSQL supports the SSL protocol, which encrypts the data sent between the client (Ultorg) and the server. Several levels of protection are supported, via the sslmode connection property. See the official PostgreSQL documentation here.
To set the sslmode property in Ultorg, click the Connection Properties button in the Connect to Database wizard.
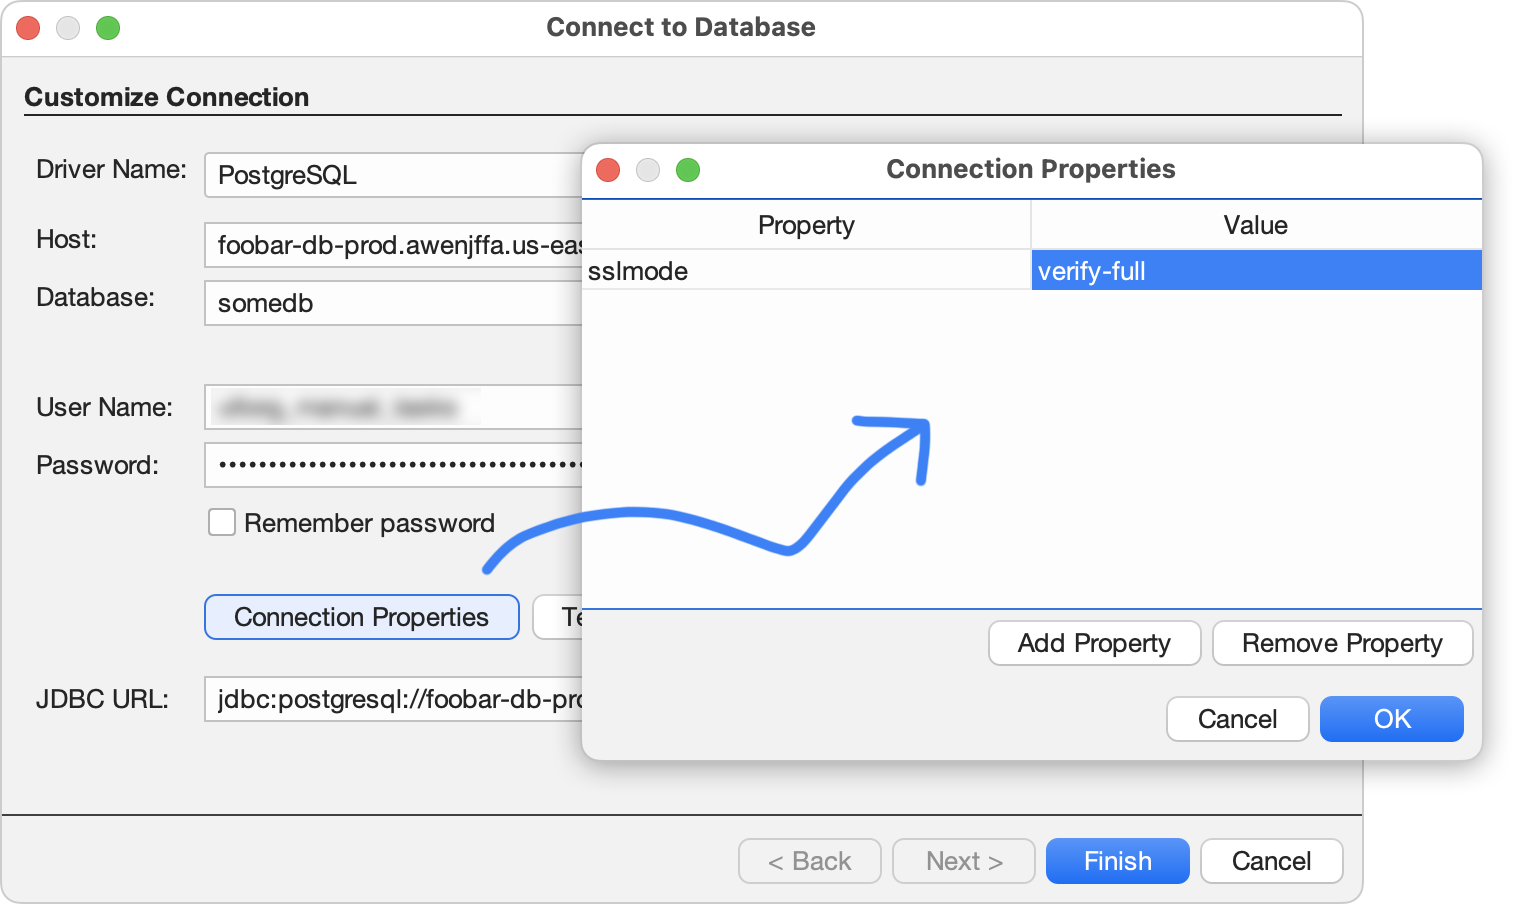
Equivalently, you can add e.g. ?sslmode=verify-full at the end of the JDBC URL.
Basic SSL Encryption
By default, the connection to PostgreSQL uses SSL if the server supports it. To verify and require that SSL is really used, set the sslmode connection property to require.
Basic SSL encryption should work without further configuration on the client. It does not, however, protect against man-in-the-middle attacks, where another computer pretends to be the server. This requires the client to verify the server's identity, which we cover next.
Validating the Server's Identity
To verify the server's identity on each connection attempt:
- Get the trusted root certificate that the client should use to verify the certificate presented by the server. This is a text file in the PEM format with extension .pem or .crt. The first line of the file typically contains the words BEGIN CERTIFICATE.
Rename the file to root.crt, and place it in the following folder:
OS Path Example Windows %APPDATA%\postgresql\ C:\Users\johnsmith\AppData\Roaming\postgresql\ MacOS ${user.home}/.postgresql/ /Users/johnsmith/.postgresql/ Linux ${user.home}/.postgresql/ /home/johnsmith/.postgresql/ The root.crt file can contain one or more root certificates, as well as intermediate certificates if needed.
For Amazon RDS, the file is called global-bundle.pem, and can be downloaded here. The file should be renamed to root.crt without any kind of conversion.
- From the Ultorg Connect to Database dialog, set the sslmode property to verify-full.
- Click Test Connection to check that the connection works.
If you have problems, try setting the sslmode property first to require, then verify-ca, and finally verify-full, and get each step working before moving on to the next. See this page for the meaning of each option.
Using a Client Certificate for Authentication
SSL certificates can also be used for authentication, when this is configured on the server. In this case, the client must have a certificate of its own, along with an associated private key.
To authenticate with SSL:
- First install the root.crt file in the appropriate folder, as per the previous instructions.
- In the same folder, install the client certificate in a file called postgresql.crt, and the client's private key in a file called postgresql.pk8. There should now be three files in the folder:
File Description root.crt Root certificate(s), in PEM format, as before. postgresql.crt Client certificate, in PEM format. postgresql.pk8 Client private key, in PKCS-8 DER format. If you have a private key in the PEM format, you can convert it to PKCS-8 DER format using the openssl command on this page (under the sslkey bullet).
- On MacOS and Linux, you may need to run the command chmod 0600 postgresql.pk8 to limit permissions on the private key file.
- From the Ultorg Connect to Database dialog, set the sslmode property to verify-full as before. Enter a User Name that matches the cn (Common Name) attribute of the client certificate, and leave the Password empty.
- Click Test Connection to check that the connection works.
If you have problems, PostgreSQL documentation recommends testing that you can make a connection with the psql command first. Once this works, you should be able to connect from Ultorg as well.
Other Notes
- If you are running pgAdmin on Windows, keyboard shortcuts in Ultorg and Chrome (Ctrl+Plus/Minus) may cease to work after connecting or disconnecting an external monitor. Switching to the pgAdmin window once should fix this.
- To ensure broad compatibility, Ultorg's test suite runs regularly on multiple PostgreSQL versions (currently 18.0, 16.0, 13.3, and 9.0).
See Also
- Connecting through an SSH Tunnel.
- Connecting to PostgreSQL servers hosted on Amazon RDS.