Other SQL Databases
Ultorg has experimental support for various other SQL dialects. The databases on this page have been tested previously and are known to support basic functionality such as joins, filter, and Sort. Only a subset of formula functions can be executed remotely on these dialects.
If you need functionality that is not directly supported on these SQL dialects, you can enable Local Query Execution to have Ultorg execute queries on a local, bundled PostgreSQL database instead. This will make all formula functions (date/time etc.) available.
SQLite
To connect to SQLite:
- In the Folders sidebar, click Add Data Source→Connect to File.
- Select the SQLite file and click OK.
To show up in the file browser, the file name should end with one of the common SQLite file extensions (sqlite, sqlite3, db, sdb, db3, s3db, sl3).
If your SQLite file has a different file extension, you can either rename it, or add it in Ultorg by clicking Add Data Source→Connect to Database, selecting SQLite and Next, and then replacing <FILE> with the path to the file in the JDBC URL field.
Known Limitations
- Date and time functions are not yet implemented for SQLite. (SQLite does not have explicit date and time types. In the future, Ultorg may emulate them.)
- Filtering will only work on columns with a declared data type. For mixed-type columns, you can work around this limitation by creating a formula column with the formula =text([OriginalColumnName]), and then filter on the formula column instead.
- Data editing will only work on columns with a declared data type (INTEGER, REAL, or TEXT).
Snowflake
To connect to Snowflake:
- Follow the instructions on this page to download the latest version of Snowflake's JDBC driver. For example, as of 2025-09-25, the latest driver file is here.
- In Ultorg, click Add Data Source in the panel to the left, and then Connect to Database.
- In the Driver dropdown, select Snowflake.
- Click Add and choose the downloaded JDBC driver file (e.g. snowflake-jdbc-3.26.1.jar). Click OK and Next.
- Then, enter your connection details.
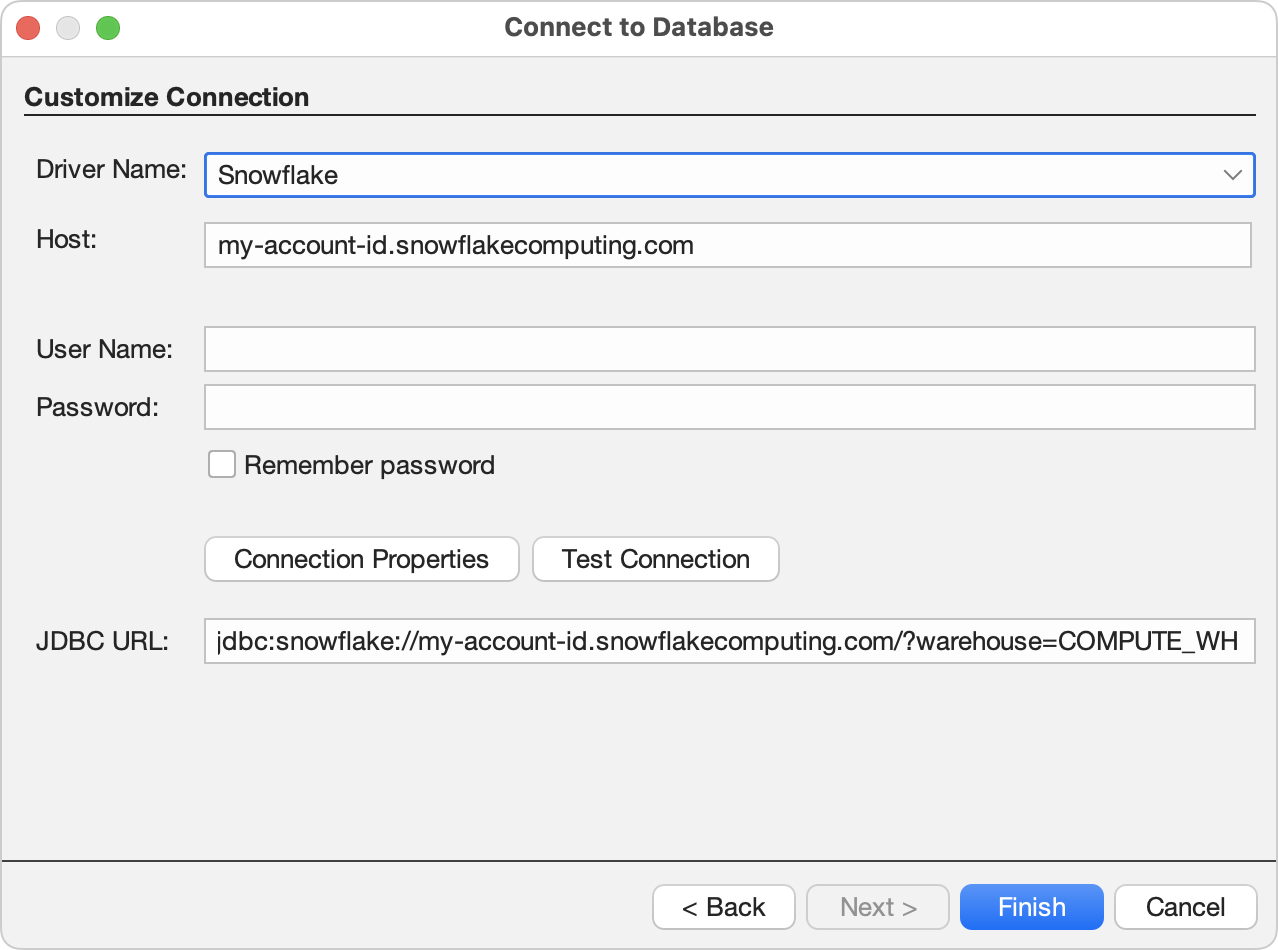
In particular:
- Enter your Snowflake account ID in the first part of the Host field.
- Modify the JDBC URL to specify a warehouse and other connection settings.
For example, the JDBC URL
jdbc:snowflake://zmrktil-prb99999.snowflakecomputing.com/?warehouse=COMPUTE_WH
connects to the server for the account identifier zmrktil-prb99999 using the warehouse COMPUTE_WH to perform queries. - Enter the username and password, if used for authentication.
- Click Finish. Your tables should become visible under a new database icon (
 ) in the Folders sidebar.
For more information, see Snowflake's own connection documentation on this page.
Amazon Athena
To connect to Amazon Athena:
- Download the Athena JDBC driver. Please download the version called "JDBC driver with AWS SDK".
- In Ultorg, click Add Data Source in the panel to the left, and then Connect to Database.
- In the Driver dropdown, select New Driver.
- Click Add and choose the downloaded JDBC driver file (e.g. AthenaJDBC42-2.1.1.1000.jar). Click OK and Next.
- Fill in your connection details. You will need to replace the AwsRegion and the S3OutputLocation in the JDBC URL.
If you are authenticating with an IAM secret access key, the Access Key ID should go in the User Name field and the Secret Access Key should go in the Password field.
Alternatively you may use an AWS credentials file, typically stored at ~/.aws/credentials (where ~ is your OS home directory). In this case, add ;Profile=default to the end of the JDBC URL to use the credentials stored under the [default] heading in the credentials file. Or replace default with the name of another profile heading in the credentials file.
For more information about authentication options for Amazon Athena, please consult the Configuring Authentication section in Amazon's documentation (page 36).
Exasol
To connect to Exasol:
- Download the Exasol JDBC driver from this page. You may need to run an installer to extract the JDBC driver JAR file.
- In Ultorg, click Add Data Source in the panel to the left, and then Connect to Database.
- In the Driver dropdown, select New Driver.
- Click Add and choose the downloaded JDBC driver file (e.g. exajdbc.jar).
Click OK and Next. - In the JDBC URL field, enter an Exasol URL as described on this page. For example,
jdbc:exa:DEMODB.EXASOL.COM/
connects to the server that is used for free trials. (You may wish to save the JDBC URL somewhere in case you need to retry these steps later.) - Enter the username and password as well.
- Click Finish. Your tables should become visible under the new database icon in the Folders sidebar.
Other JDBC-Based Sources
For other databases not explicitly supported, you can connect with a custom JDBC driver that is provided by your database vendor. Ultorg will attempt to auto-detect the SQL syntax that is needed for basic functionality.
To connect to a database using a custom JDBC driver:
- Click Add Data Source→Connect to Database.

- Select New Driver from the Driver dropdown.

(If you have previously installed the driver, you can skip this step and instead select the driver in the dropdown.)
- Click Add to add the JDBC driver JAR file(s). Some drivers have a single JAR file, others have multiple JAR files.
- Fill in the Driver Class field, if it is not automatically populated. This value looks something like com.vendor.somedb.SomeDatabaseDriver, and will be found in the documentation for the JDBC driver.
- Give the driver a descriptive Name. Any name will work.
- Click OK and Next.
- Fill in the connection details for your database. See the documentation for your JDBC driver.
- Click Test Connection to check that the connection works. Then click Finish.
In the Folders sidebar, your data source (
) will appear with available tables ( ) underneath.